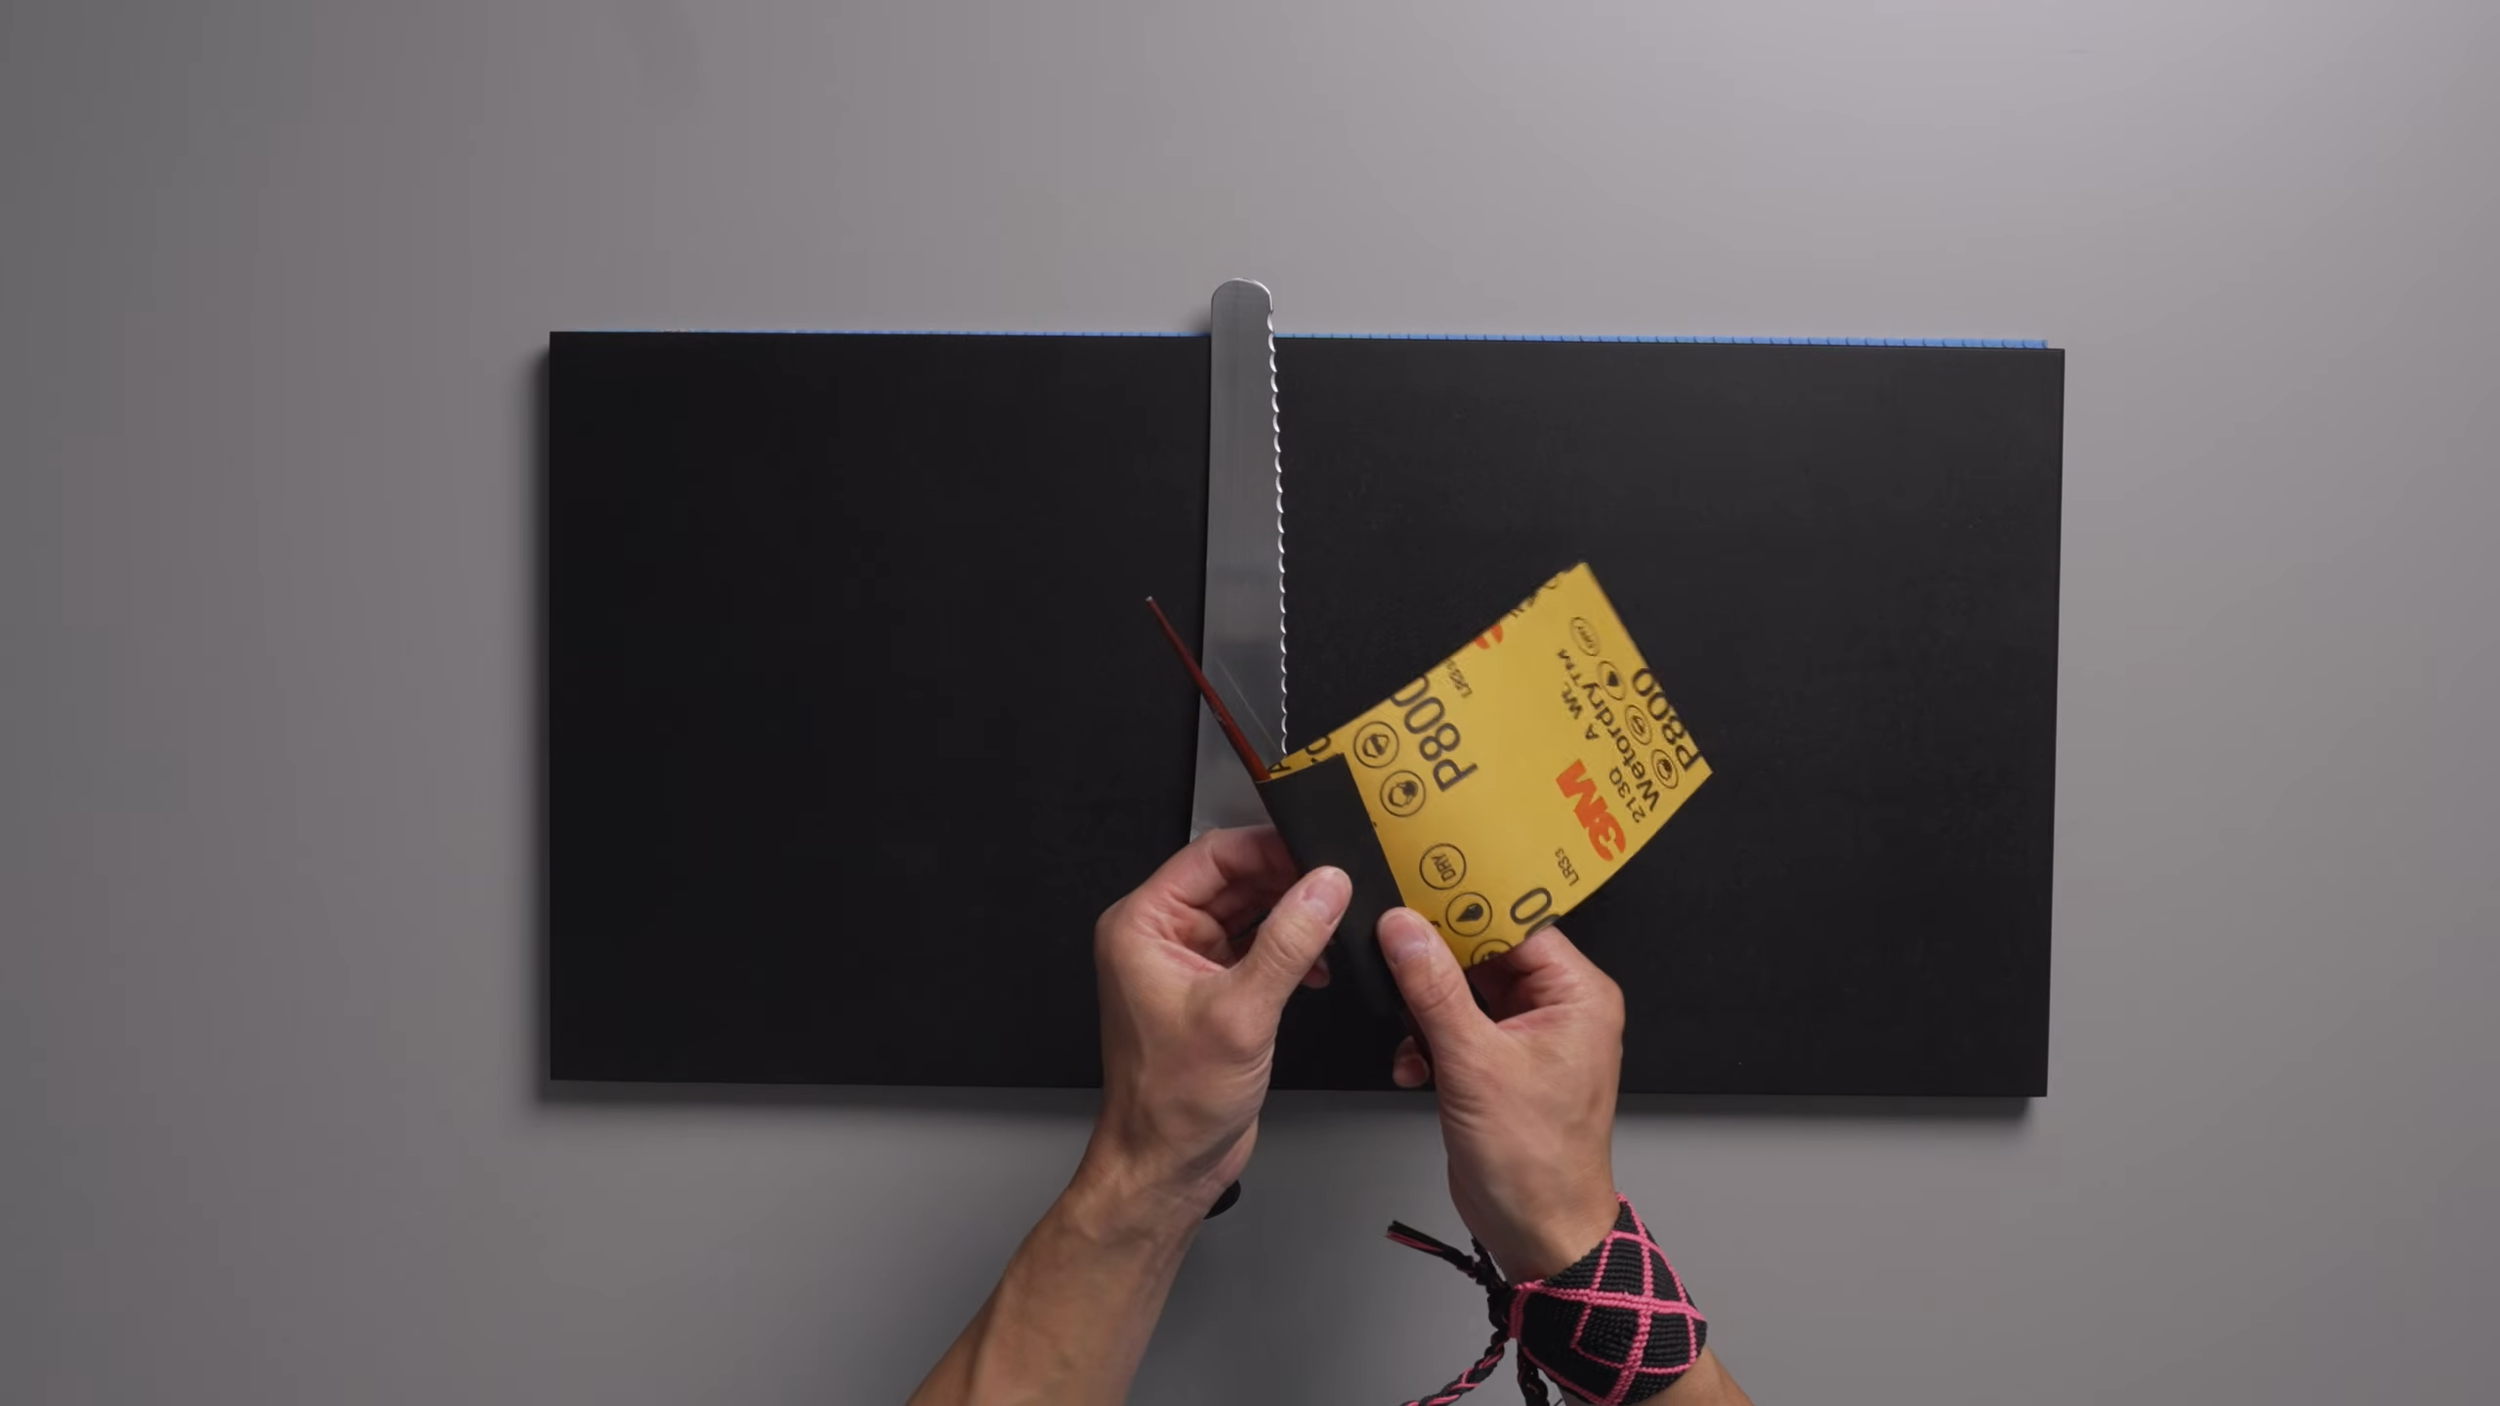
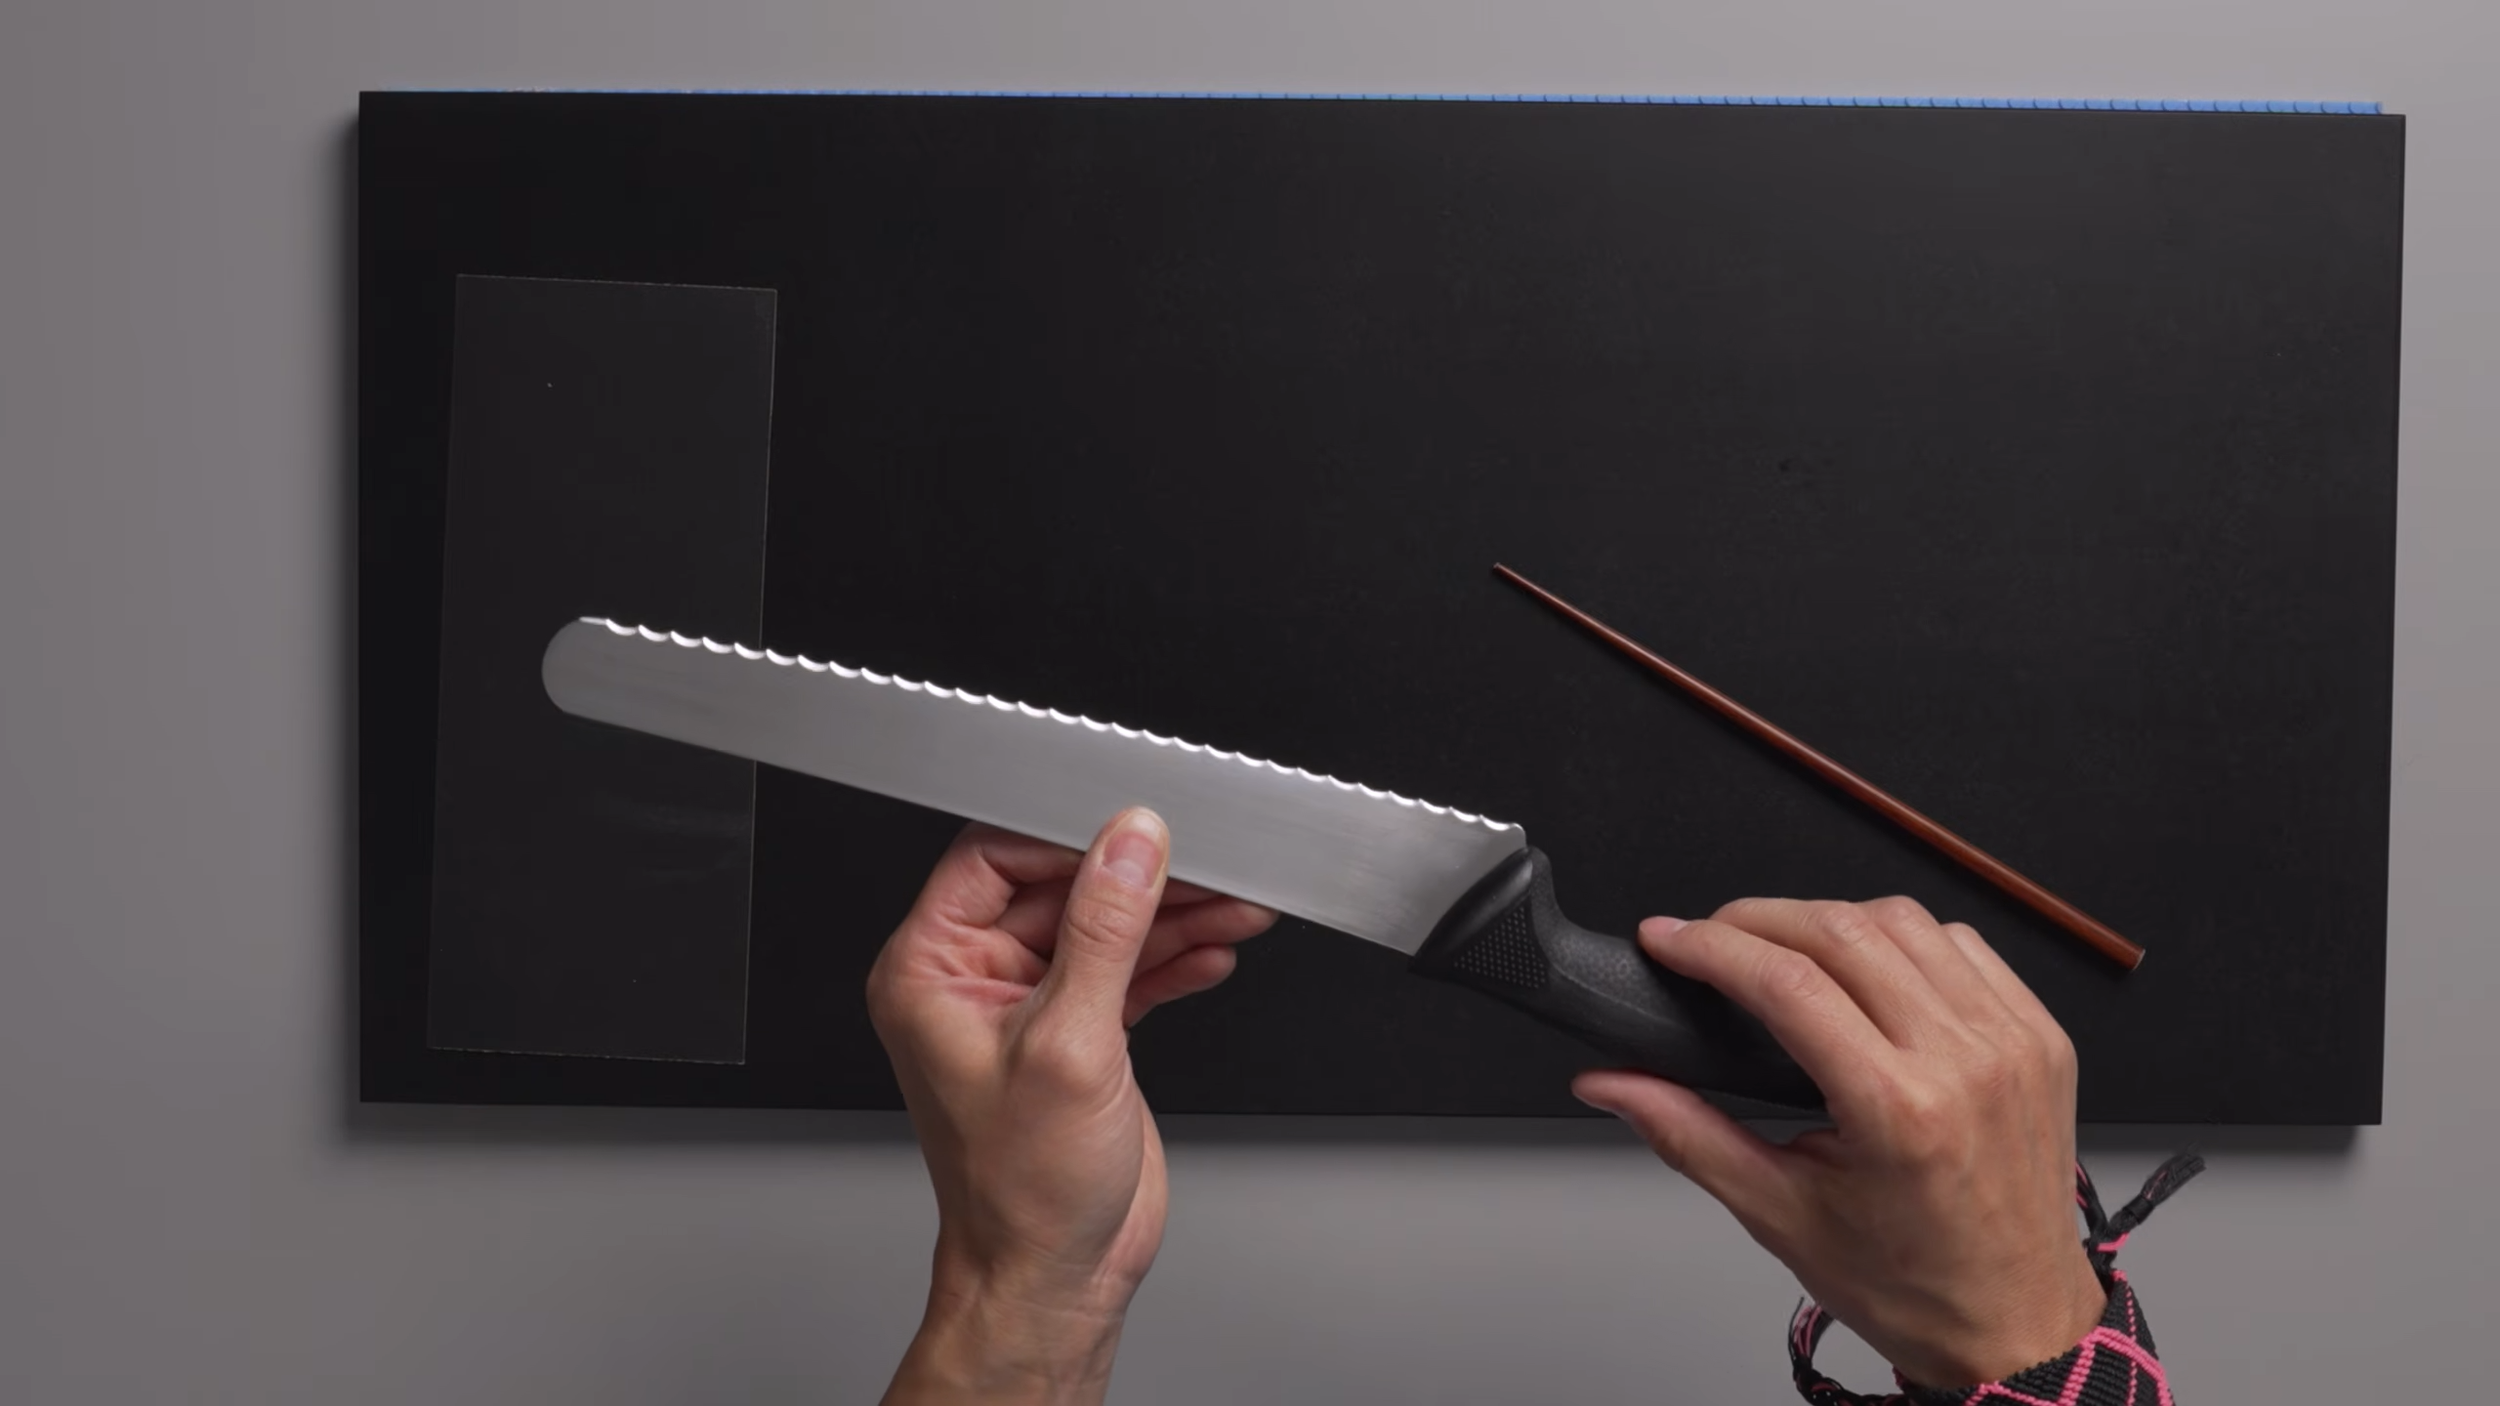
Serrated bread knives are widely considered disposable tools once they dull, largely due to the prohibitive cost and difficulty of using specialized conical ceramic slipstones. By leveraging the continuous conical taper of a wooden chopstick paired with 800-grit silicon carbide sandpaper, you can match any scallop radius, restore the gullets, and cleanly debur the chisel grind for pennies.
trust retailers BurrfectionStore | Gyuto | WasabiKitchen | Amazon
Disclosure: As an Amazon Associate, I earn from qualifying purchases.
Serrated bread knives occupy a peculiar place in both home and professional kitchens: they are among the most heavily used tools, yet they are almost universally treated as disposable.
When a standard chef's knife or gyuto dulls, it goes straight to the waterstones. When a serrated knife loses its bite—crushing sourdough loaves, bruising tomato skins, and scattering crumbs across the cutting board—most cooks simply retire it.
The reluctance to maintain serrated blades stems from a geometric challenge: flat whetstones cannot access the interior curvature of the recessed cutting teeth (gullets). Commercial solutions, such as conical ceramic slipstones or diamond needle files, are expensive, fragile, and often feature tapers that do not match the specific radius of a given blade's scallops.
However, an ordinary tapered wooden chopstick and a sheet of 800-grit silicon carbide sandpaper provide an accessible, mathematically sound solution. By treating the chopstick as an infinitely adjustable conical mandrel, you can restore individual scallops with surgical precision.
1. Anatomy of a Serration: Gullets, Peaks, and the Chisel Grind
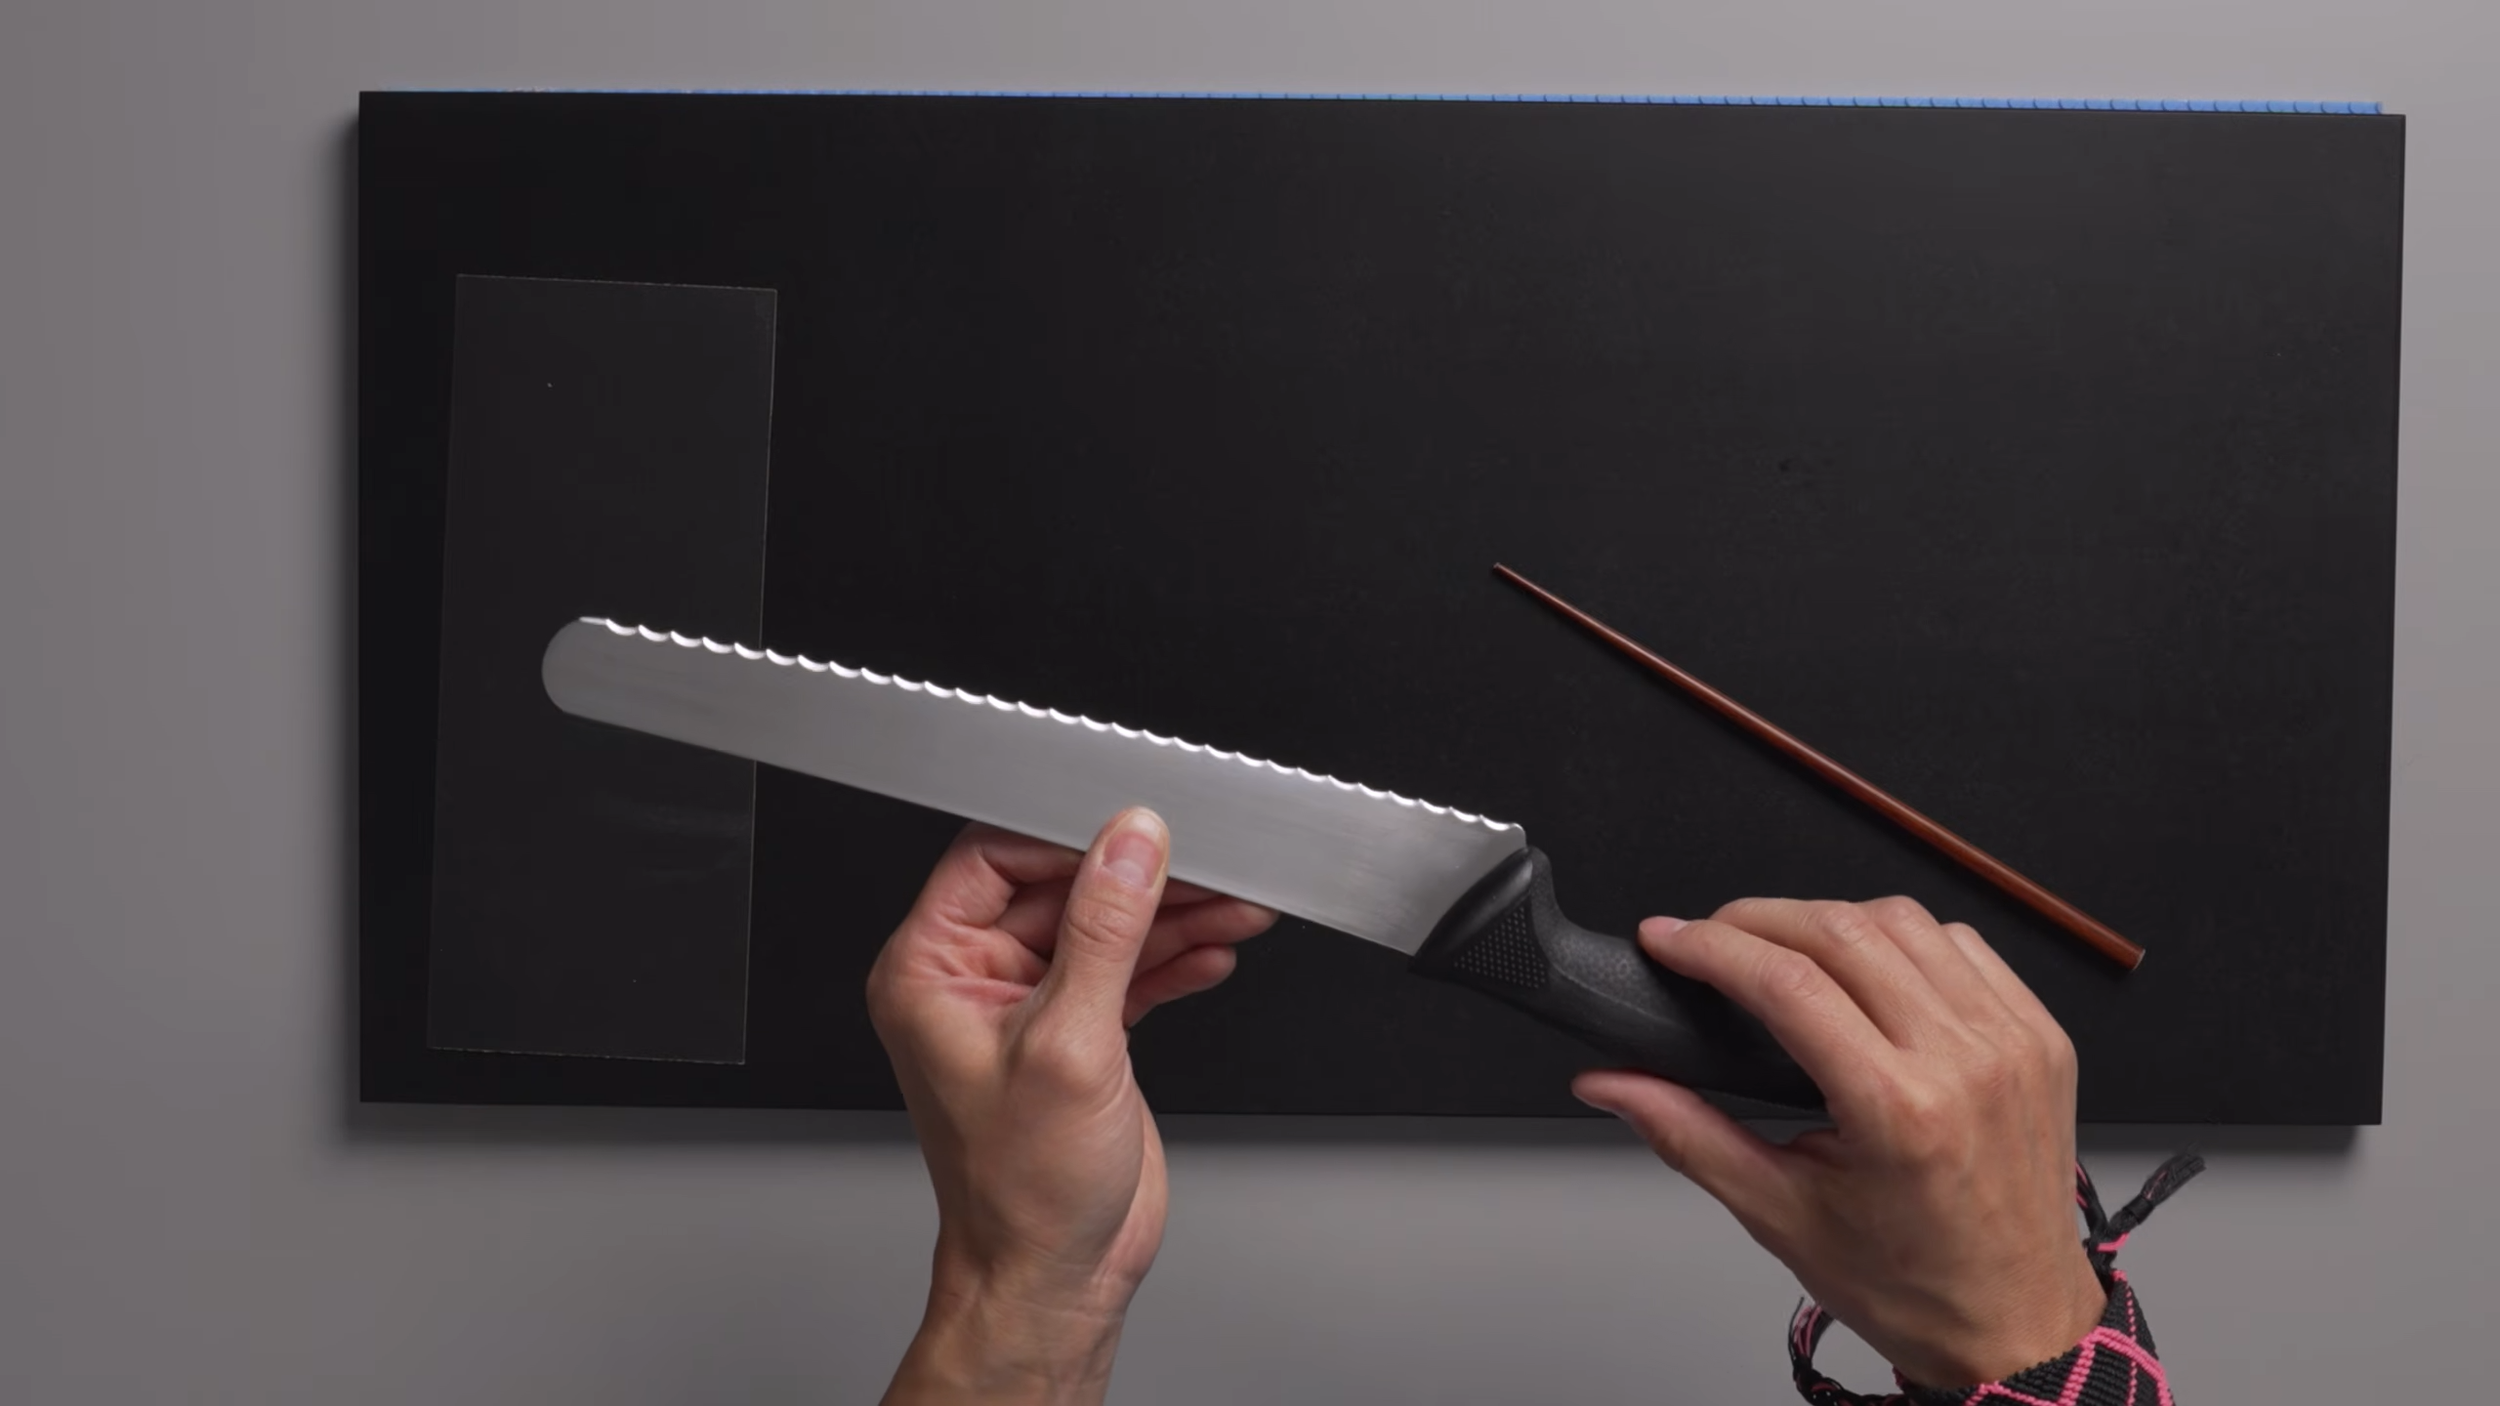
To sharpen a serrated edge, you must first understand that almost all commercial bread knives—including industry standards like the Mercer Millennia or Victorinox Swiss Classic—are ground as single-bevel chisel tools.
Inspecting the edge of a bread knife reveals two distinct faces:
The Show Face (Right Side): Each individual tooth contains an excavated, radiused concavity known as a gullet, flanked by sharp forward points (peaks). The gullet terminates in an angled cutting bevel (typically between 18° and 22°).
The Back Face (Left Side): The reverse side of the blade is entirely flat. There are no individual bevels ground into the teeth on this side.
Because the cutting mechanics are concentrated within the scooped gullets, the forward peaks do not perform the primary slicing; they merely puncture hard outer crusts. The true shearing action happens along the concave curve of each gullet. Attempting to sharpen a bread knife by running it flat against a conventional whetstone grinds down the protective peaks, shortens the operational lifespan of the steel, and ruins the profile.

2. The Tapered Cone: Why the Chopstick Works
The primary obstacle when sharpening serrations is radius matching. Knife manufacturers use wildly varying scallop profiles: some favor tight, narrow, pointed teeth (frequently seen on offset utility knives), while others use wide, sweeping, gentle gullets (common on European pastry and bread blades).
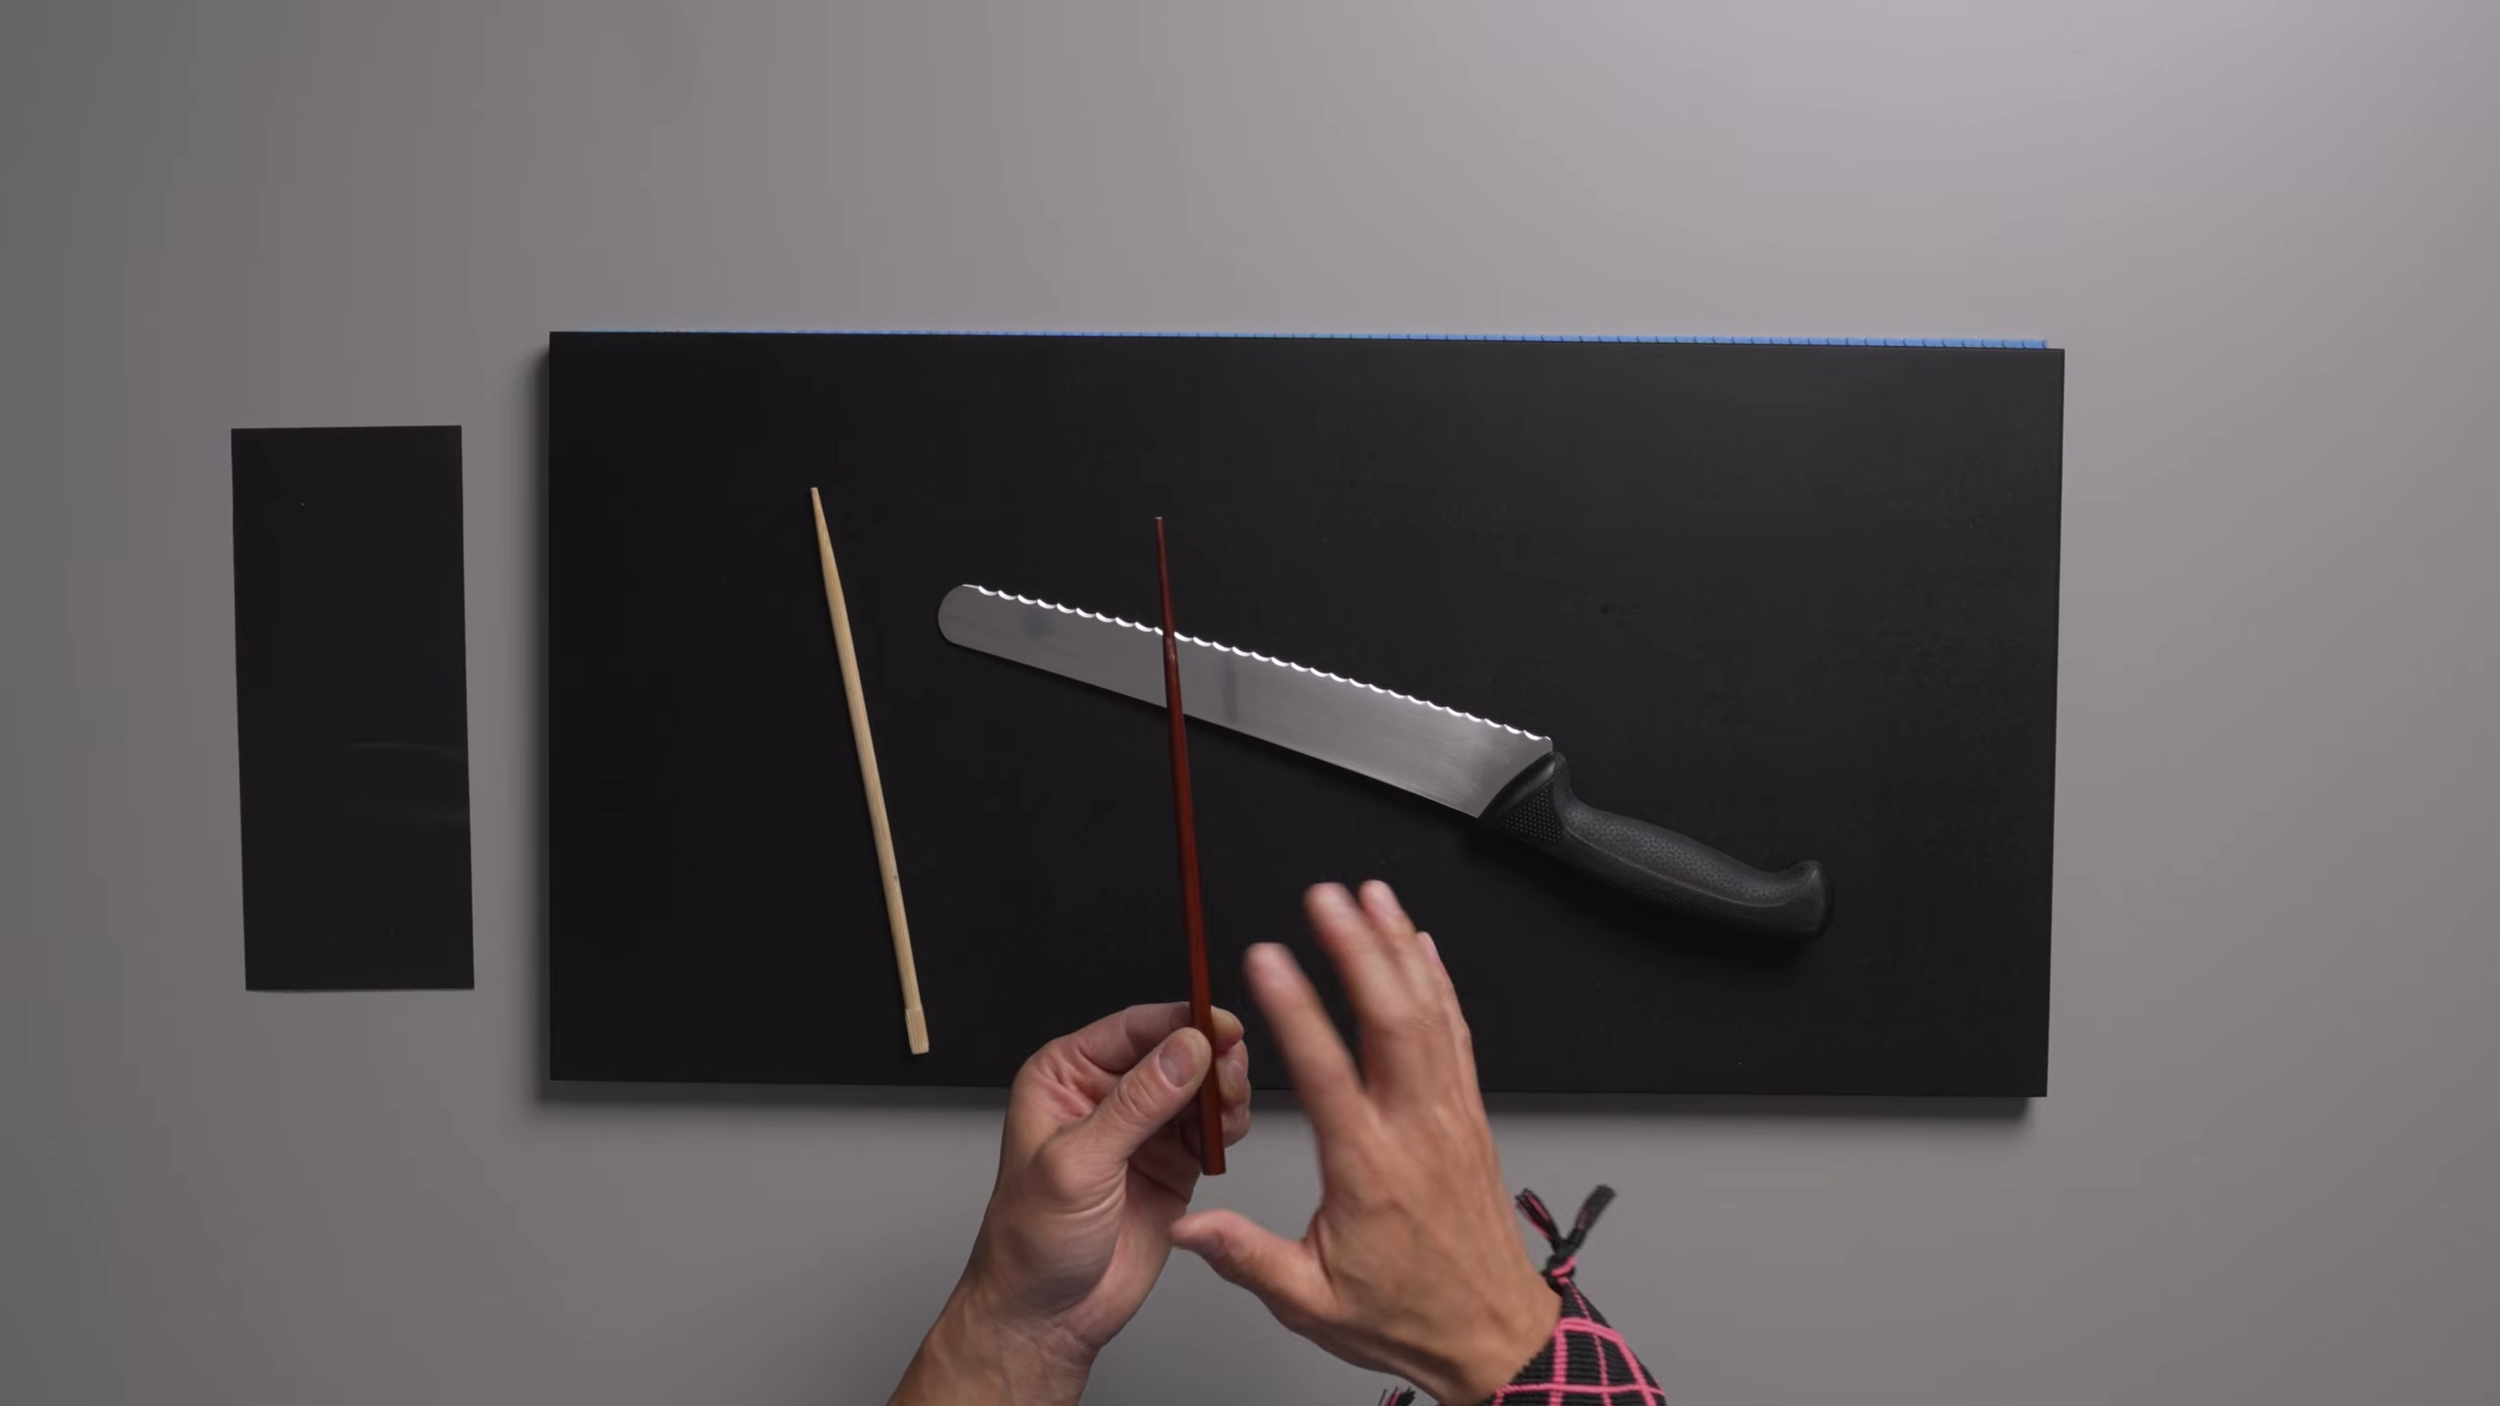
A standard disposable or reusable wooden chopstick is an elongated cone.
The diameter increases continuously from a fine, narrow point at the tip to a broad, sturdy cylinder at the base.
This continuous gradient functions as a universal mandrel.
By sliding the chopstick into a blade's scallop, you can find the exact cross-sectional diameter that matches the curvature of that specific gullet.
Wood also provides the ideal structural backing: it is rigid enough to transfer uniform hand pressure across the steel, yet soft enough to yield slightly under load, preventing localized pressure ridges from gouging the bevel.

3. Abrasive Selection: The 800-Grit Sweet Spot
Selecting the correct abrasive grade for serrated maintenance requires balancing steel removal speed against edge toothiness. Standard wet/dry silicon carbide sandpaper is the optimal medium.
ABRASIVE SELECTION FOR SERRATED GULLETS

P220 – P400 Grit:
  ❌ Too Aggressive: Cuts deep, uncontrolled directional scratches.
  ❌ Heavy Burr: Throws thick wire burrs that fracture fragile scallop tips.

P800 Grit (The Bench Sweet Spot):
  ✔ Optimal Material Removal: Refreshes dull factory bevels in 10–15 seconds.
  ✔ Functional Micro-Bite: Leaves microscopic teeth ideal for sawing hard crusts.
  ✔ Clean Deburring: Yields a fine, easily detached foil along the reverse face.

P2000+ Grit:
  ❌ Over-Polished: Creates an apex too slick to catch waxy tomato skins or crusts.
Using coarse sandpaper (such as 320 or 400 grit) creates deep micro-scratches that act as stress risers, increasing the risk of edge chipping under heavy board impact. Conversely, polishing a bread knife to an ultra-fine 3,000 or 5,000-grit mirror finish removes the aggressive sawing bite required to sever dense, crusty sourdough crusts.
An 800-grit finish strikes the exact technical balance: it strips spent oxidized steel, establishes a crisp apex, and leaves clean micro-striations that bite tenaciously into food surfaces.
4. Step-by-Step Sharpening Protocol
Step 1: Workstation Setup and Blade Stabilization
Sharpening serrations requires steady angle control. Trying to hold the knife unsupported in the air leads to fluctuating bevel angles and rounded peaks.
Place the blade flat on an elevated workbench, cutting board, or thick block of plywood, allowing the beveled cutting edge to overhang the edge by half an inch.
Anchor the handle firmly with your non-dominant hand. This keeps the blade planar, leaves your dominant hand free, and prevents accidental slips.
Step 2: Sizing and Rolling the Mandrel
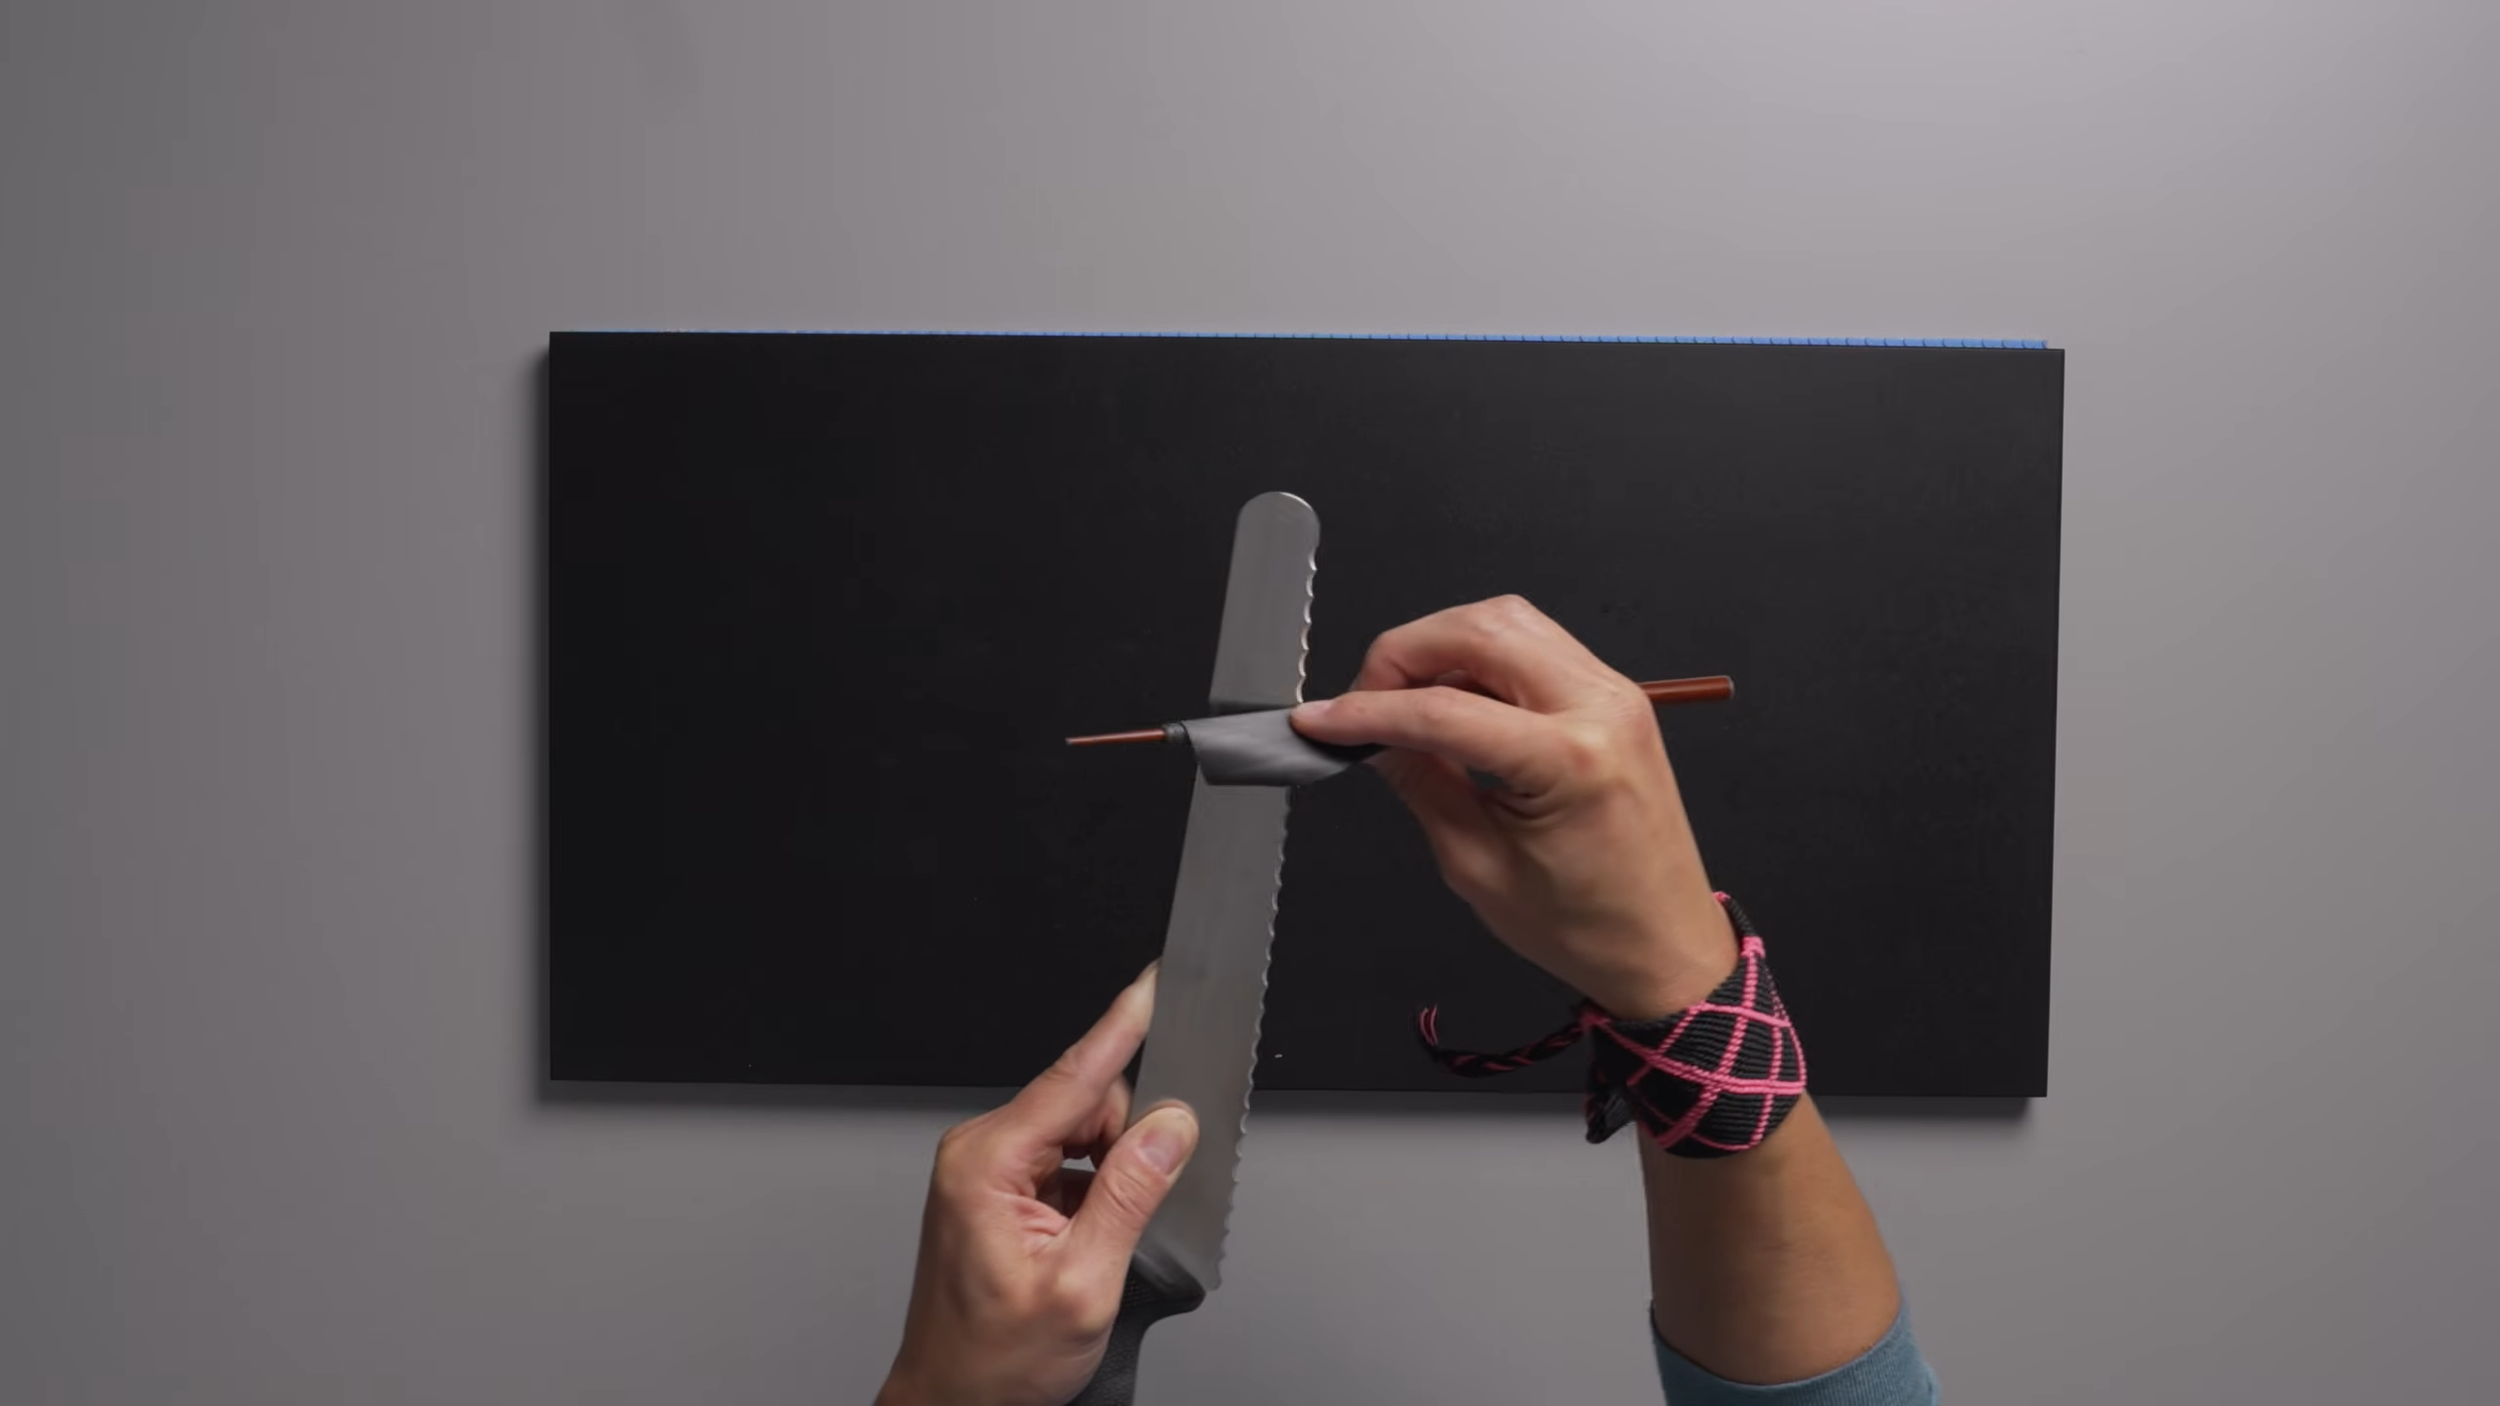
Cut a small rectangular strip of 800-grit sandpaper, roughly 2 inches wide by 3 inches long.
Locate the zone along the chopstick that matches the radius of your knife's scallops.
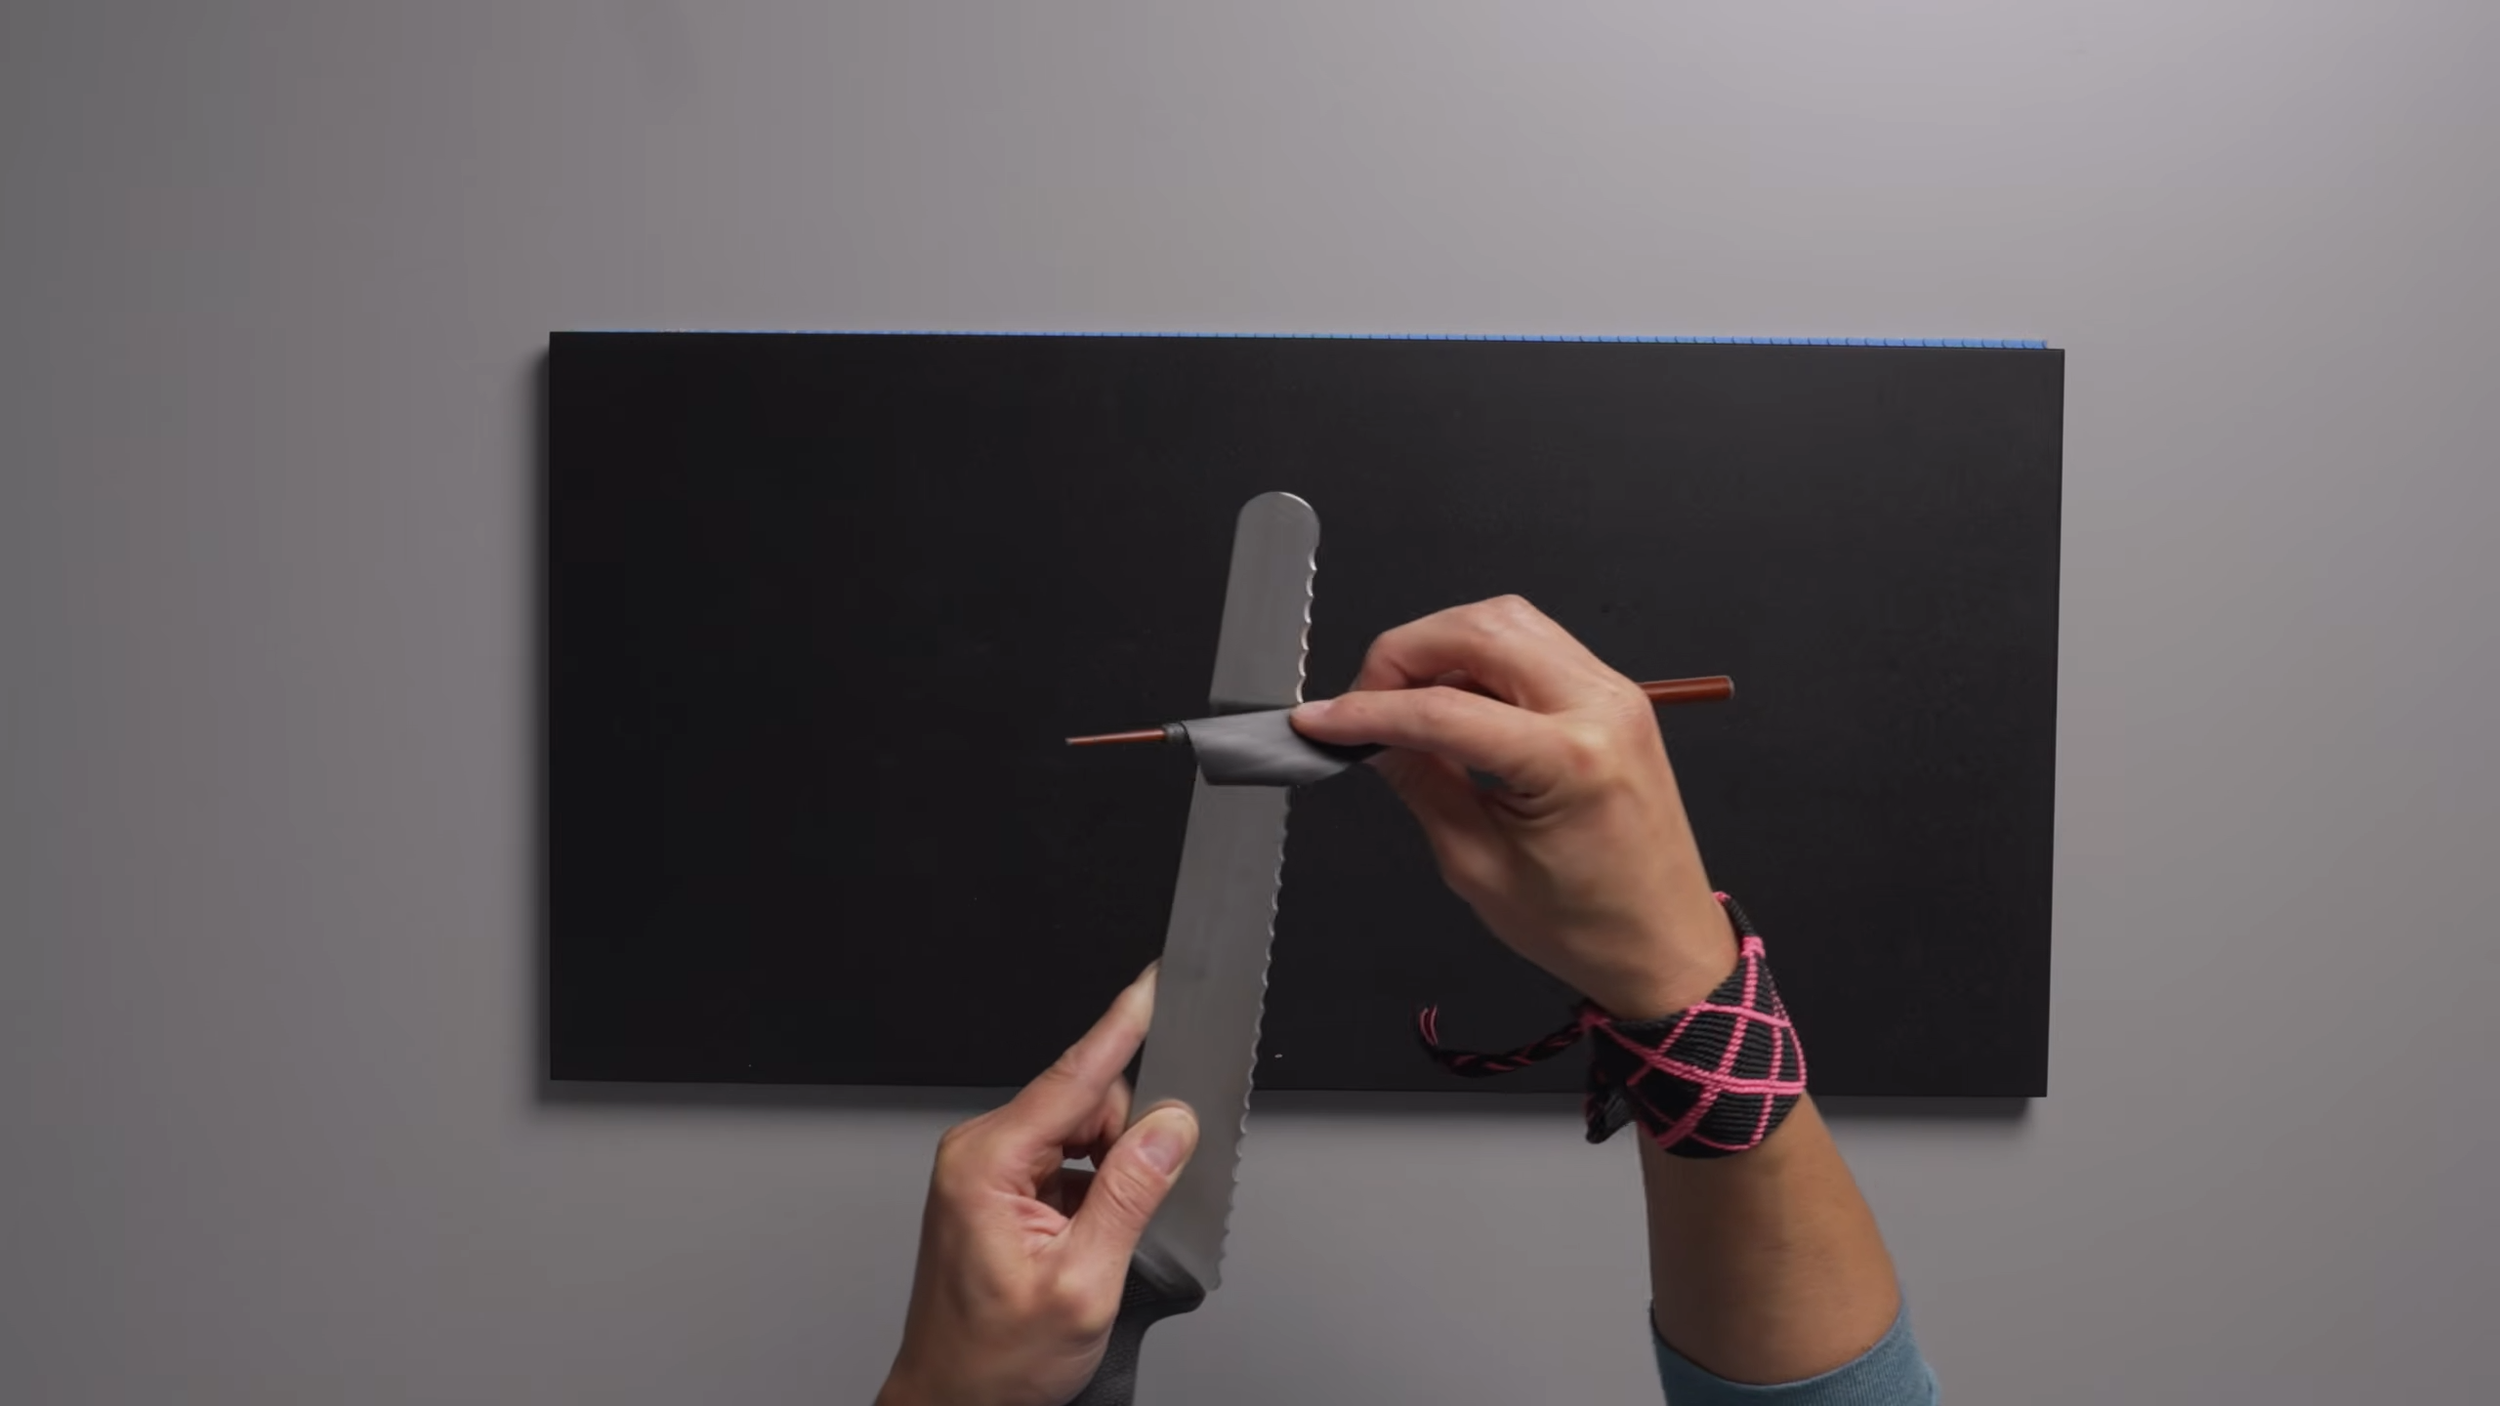
Wrap the sandpaper tightly around the chopstick parallel to its axis.
Avoid rolling the paper spirally or at an angle. Diagonal wrapping creates exposed paper edges that catch on the sharp peaks of the teeth, tearing the abrasive and introducing uneven high spots into the scallop.
Step 3: Calibrating the Bevel Angle (~20°)
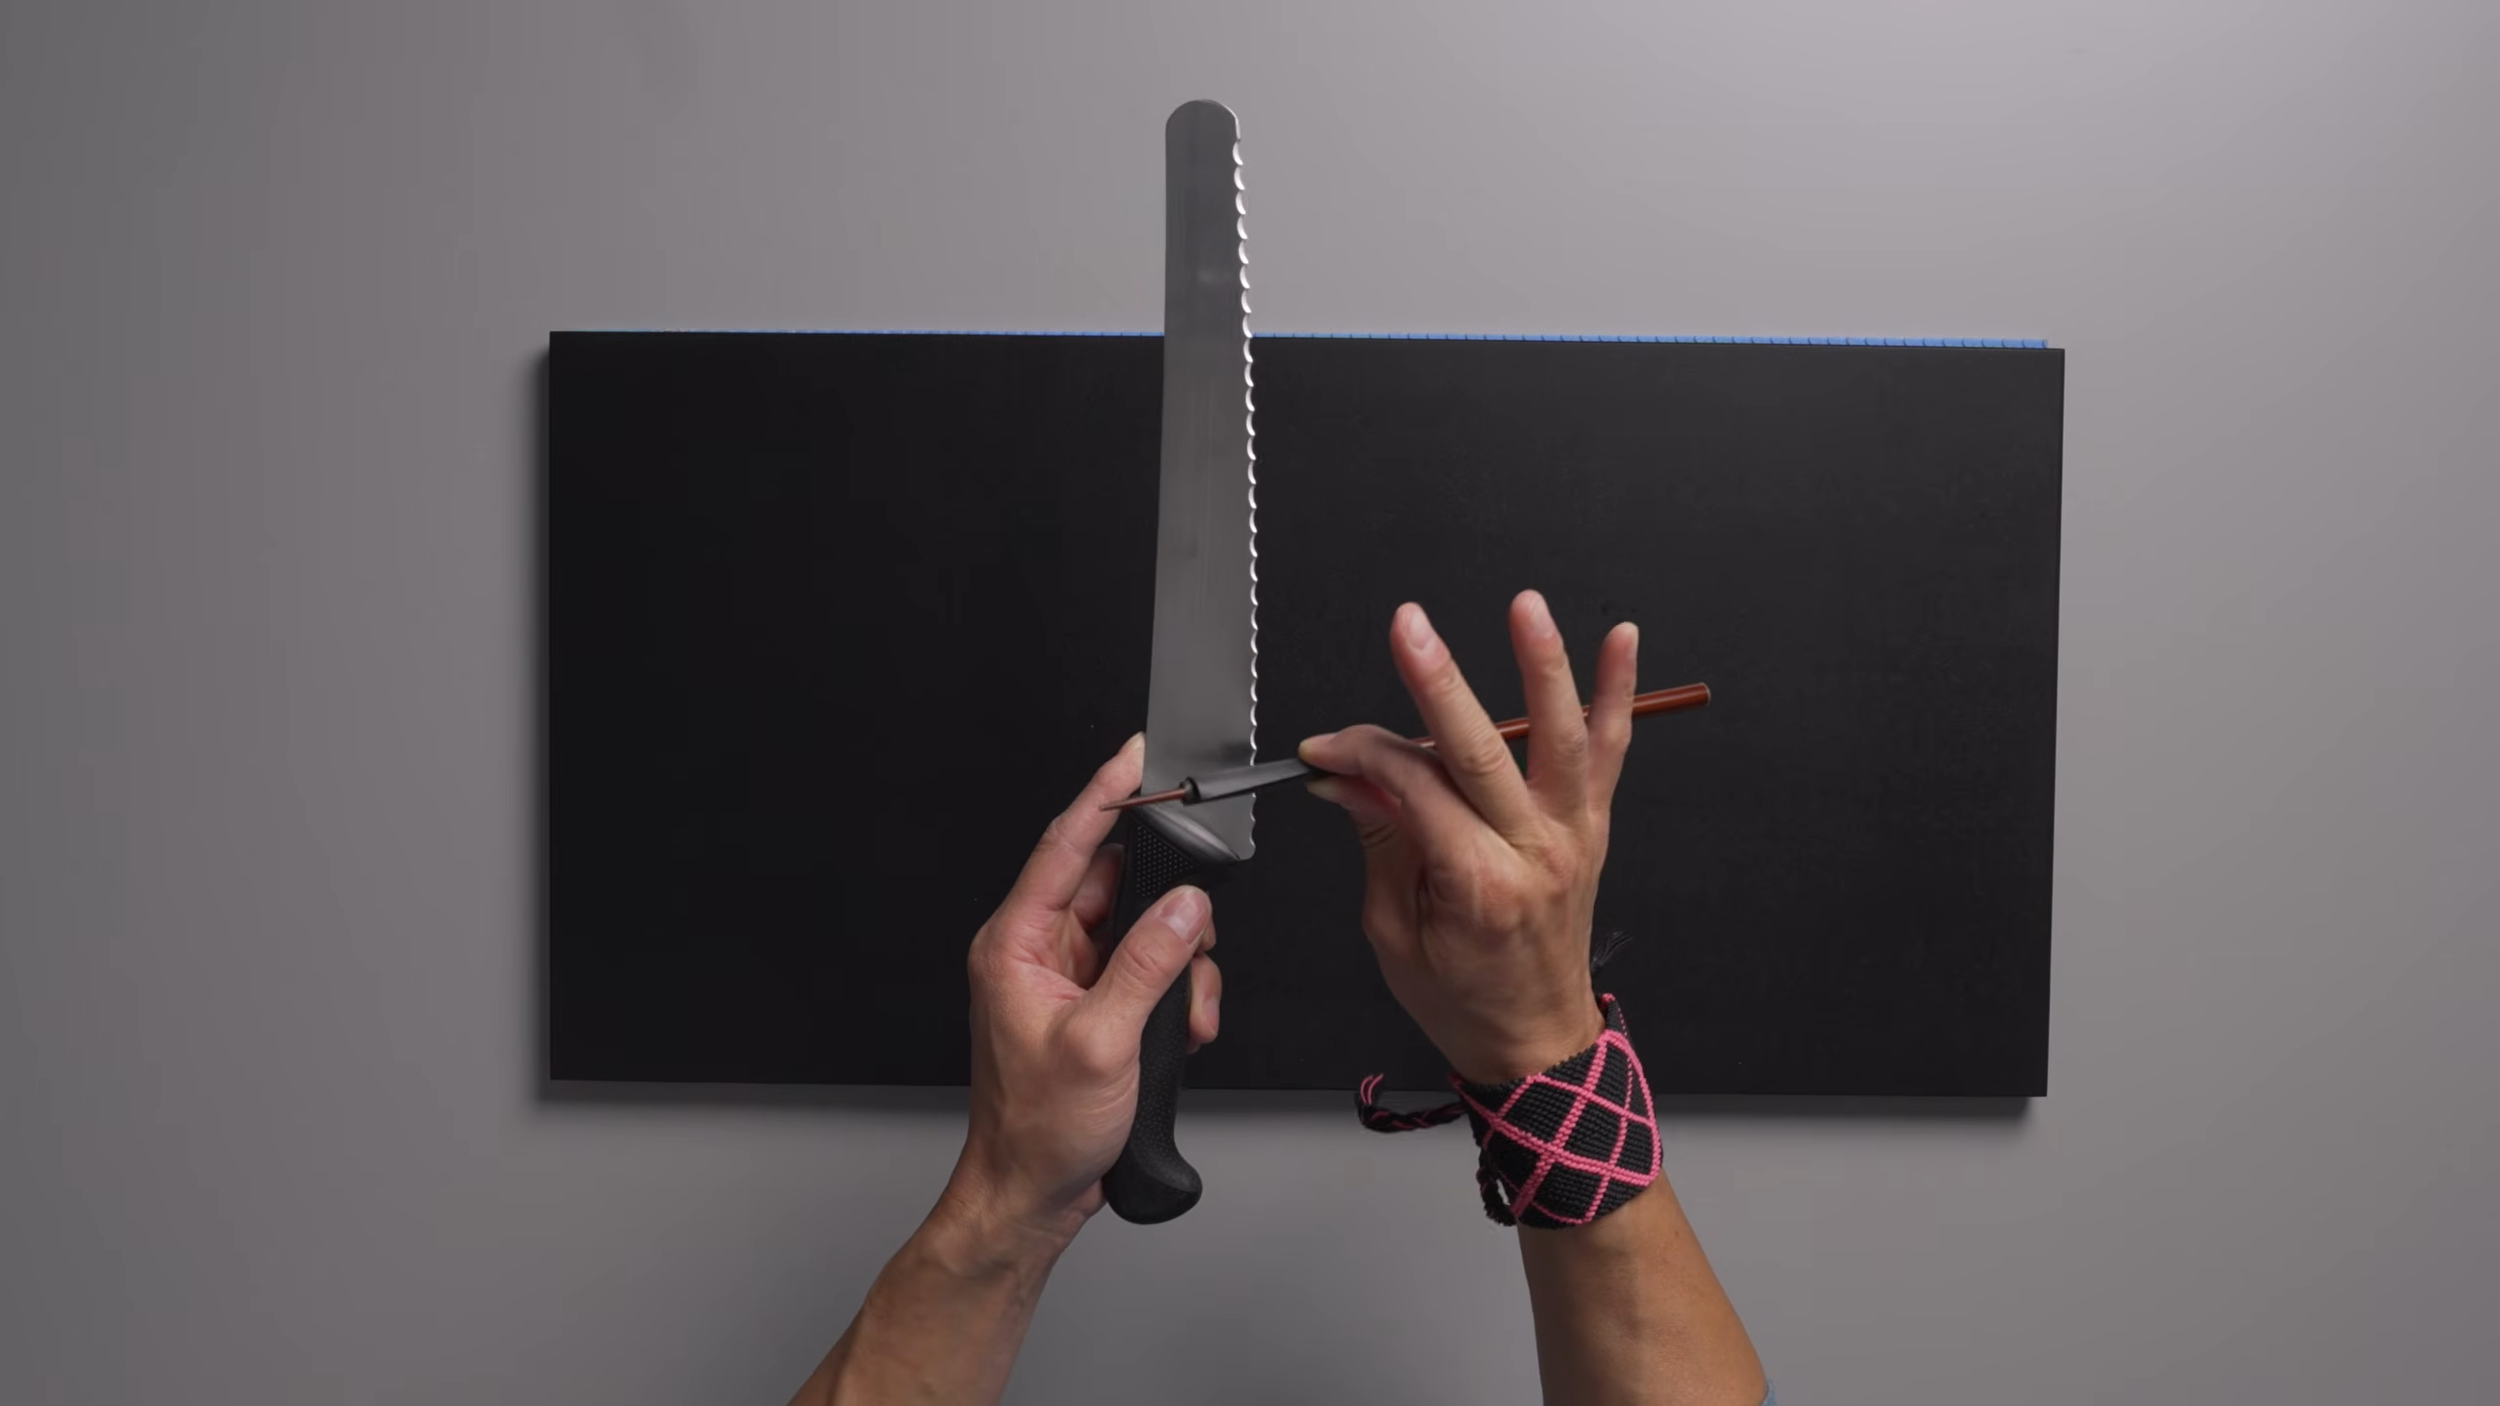
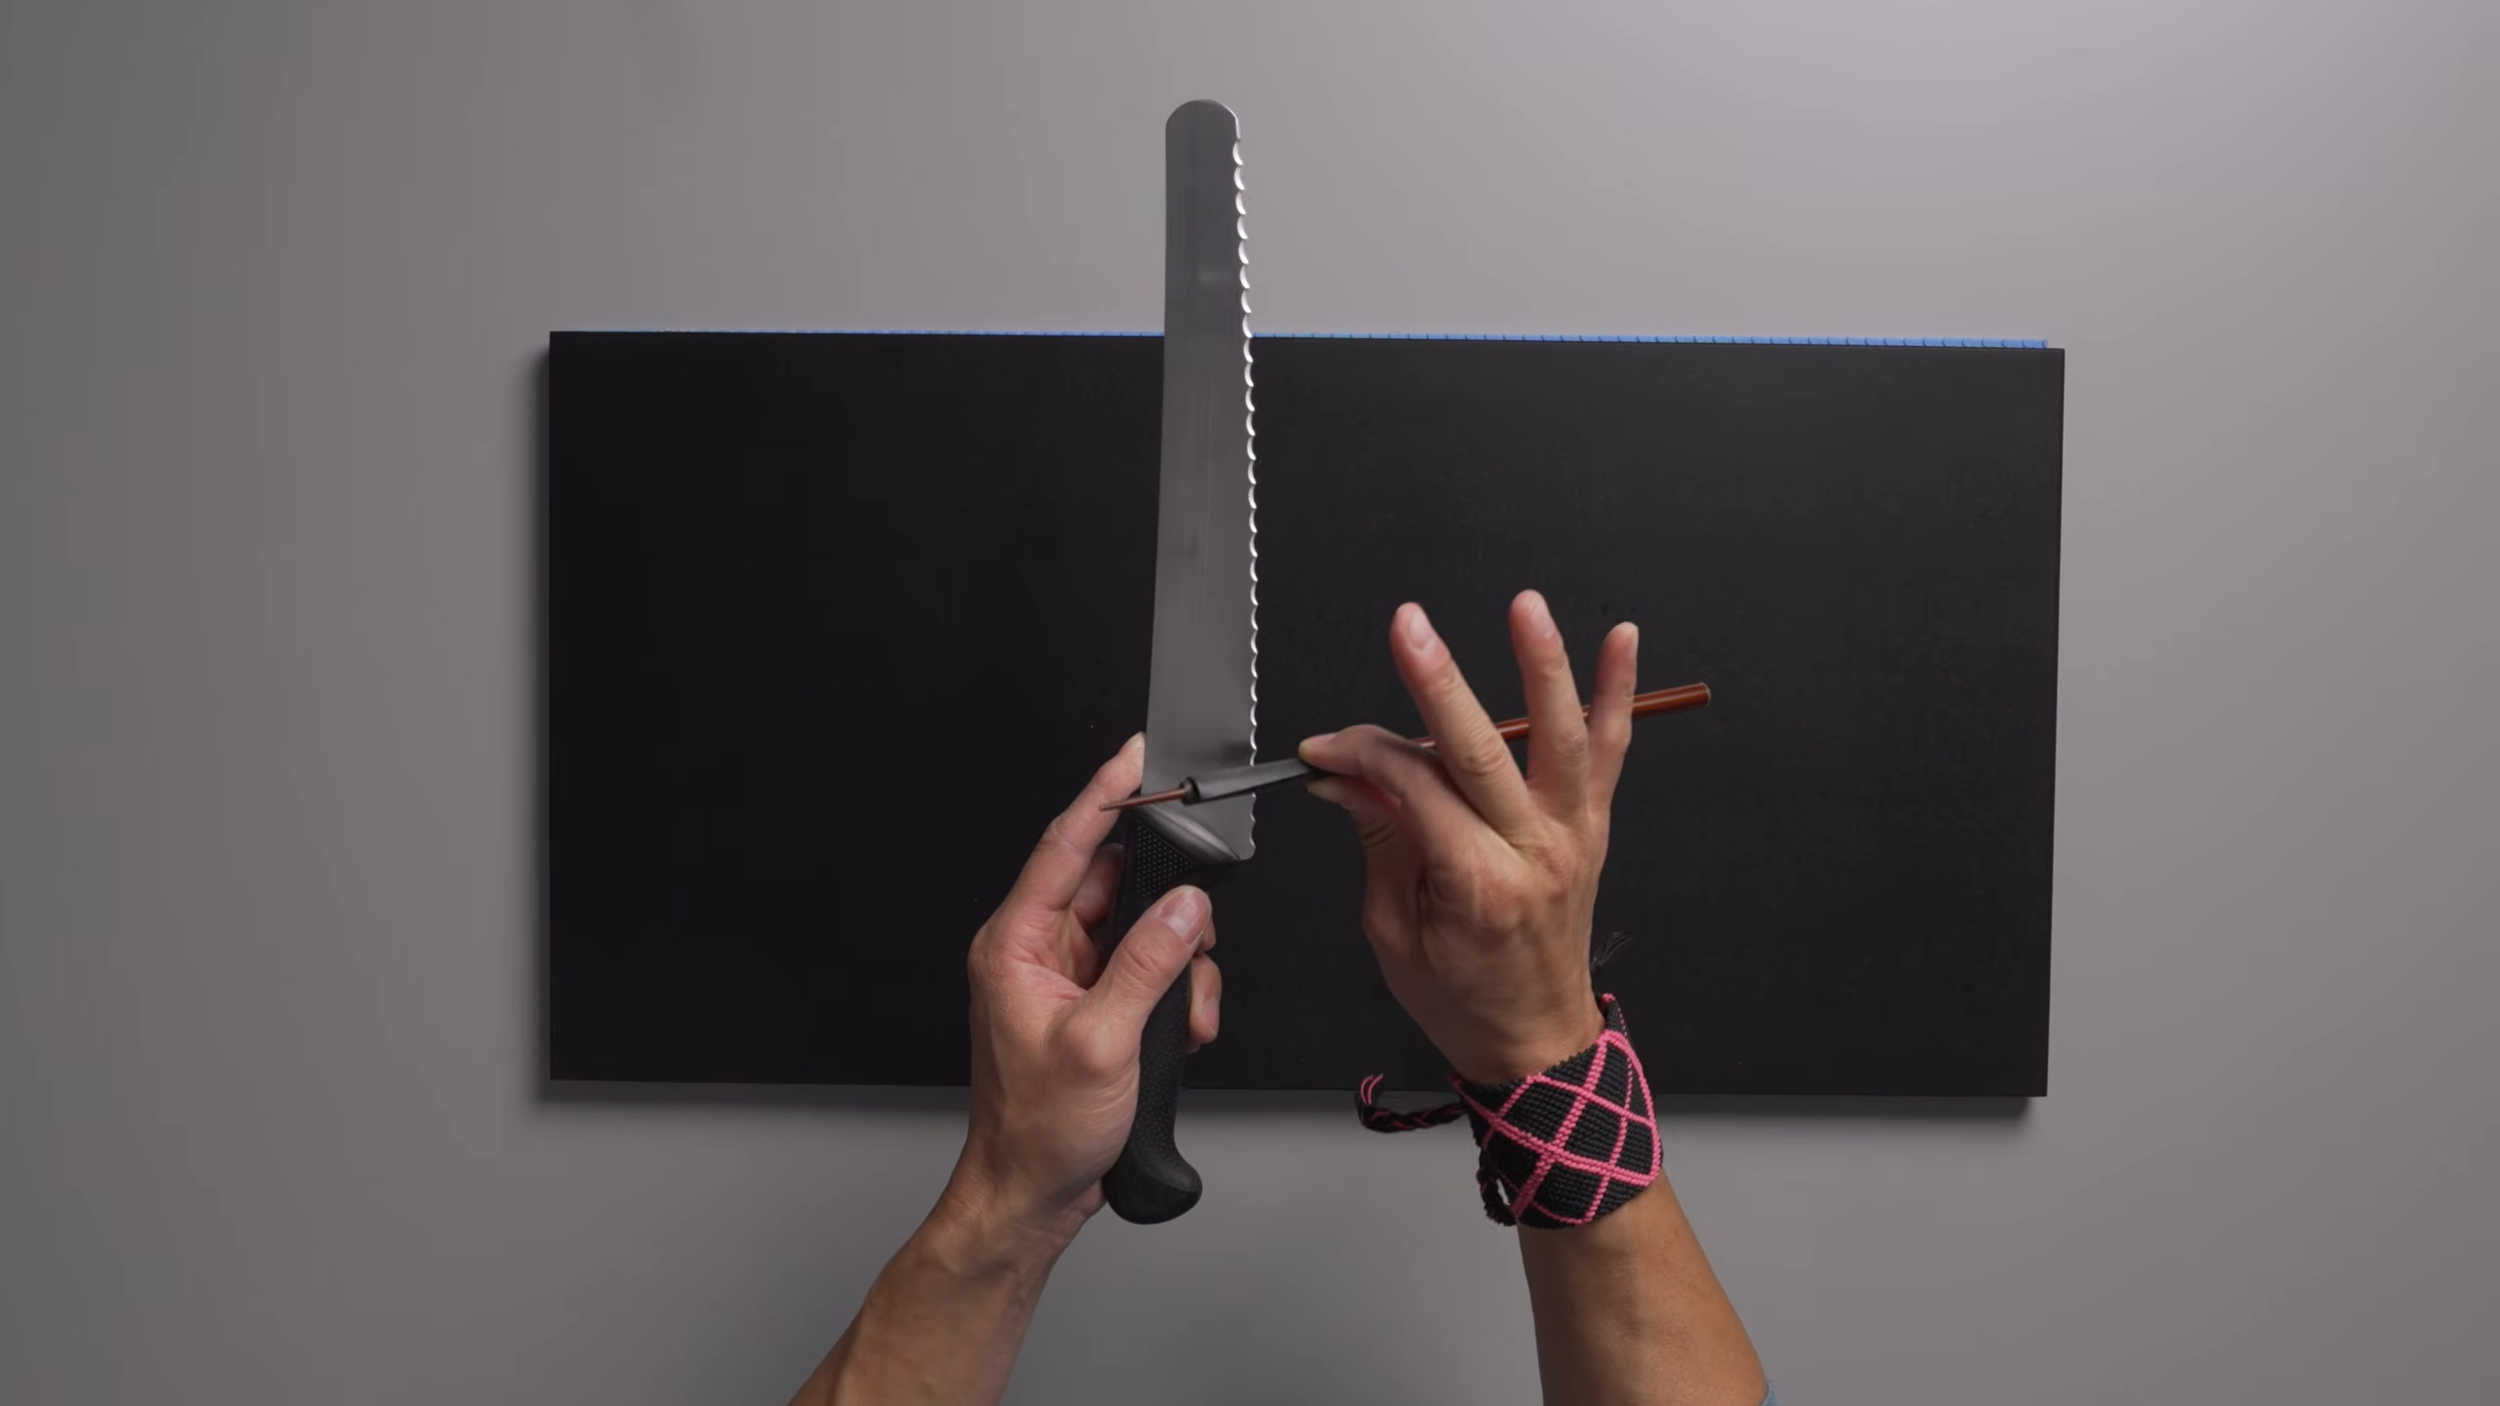
Place the wrapped chopstick inside the first gullet at the heel of the knife.
Begin at a shallow angle and slowly tilt the chopstick upward until the abrasive sits dead-flat against the factory bevel (typically roughly 20 degrees).
If you hold the chopstick too close to perpendicular (90°), the paper will catch against the razor-thin floor of the gullet and shear.
If you hold it too low, you will grind away the cosmetic shoulder without ever touching the actual cutting apex.
Step 4: Grinding the Scallop
Apply light, even pressure and stroke the chopstick through the gullet using short, sweeping passes.
Focus the abrasive entirely between the peaks. Do not press downward onto the tips of the teeth.
Dedicate 10 to 15 seconds (roughly 15 to 20 smooth passes) to each individual scallop.
As the sandpaper loads with gray steel swarf, unroll the paper slightly to expose a fresh, sharp abrasive surface. Work your way methodically down the blade, moving from the heel to the tip.
5. The Critical Deburring Phase
Because the Mercer Millennia and similar knives feature a single-bevel architecture, grinding the show-side gullets displaces steel and creates a continuous wire burr along the flat reverse side.
DEBURRING THE FLAT REVERSE FACE

Step 1: Check Burr Alignment
  Sweep dry thumb pad from spine down across the flat face.
  A distinct, continuous metallic lip should catch your skin at each gullet
Burr Detection: Sweep your thumb pad gently from the spine down past the edge on the flat (left) side of the knife. You will feel a distinct metallic lip or roughness opposite every sharpened gullet.
The Flush Pass: Take a piece of rolled sandpaper or a flat scrap of leather. Lay it dead-flat (flush) against the unground reverse side of the knife.
The Stroke: Using ultra-light pressure, draw the abrasive down the flat face from heel to tip in a single, smooth trailing motion.
The Golden Rule: Never tilt the abrasive on the reverse side. Adding even a 2-degree secondary micro-bevel to the flat face alters the knife’s single-bevel shearing geometry, causing the blade to steer sideways and bind during long slicing strokes.
6. Bench Testing: Validating the Edge
Once deburred, wipe the blade clean with a damp microfiber cloth to remove spent silicon carbide particles and loose steel swarf.
+--------------------------------------------------------------------------+
| BENCH DIAGNOSTIC: TESTING SERRATED PERFORMANCE                           |
|                                                                          |
| Test 1: The Push-Cut Paper Test                                          |
| ├── Test each individual scallop against standard 20lb copy paper.       |
| └── The paper should slide cleanly into each gullet and sever without    |
|     catching, snagging, or tearing at the transitions.                   |
|                                                                          |
| Test 2: The Sourdough Crust & Ripe Tomato Check                          |
| ├── The blade should bite into a tough, glossy bread crust on contact    |
| │   without skittering across the surface.                               |
| └── When drawn across a soft, ripe tomato, the gullets should initiate   |
|     the cut purely through blade weight, producing clean, uncrushed slices.|
+--------------------------------------------------------------------------+
If a specific scallop catches or tears paper during testing, that individual gullet either carries residual foil burr on the flat back or was under-sharpened near the apex. Return the chopstick to that specific tooth for five additional light passes, execute a flush deburring stroke on the back, and re-test.
Precision Maintenance Without the Markup
Serrated kitchen knives do not require complex machinery or industrial belt grinders to maintain. In fact, running a bread knife against high-speed motorized wheels is the fastest way to overheat the thin steel tips and ruin their factory temper.
By understanding the mechanics of a single-bevel chisel grind, utilizing the natural conical gradient of a wooden chopstick, and adhering to an 800-grit abrasive baseline, you can restore every scallop on a dull bread knife to razor keenness in under fifteen minutes.
A sharp knife is a safe knife—and that principle applies just as much to the bread knife as it does to your flagship gyuto.