When sharpening Japanese kitchen cutlery—specifically a classic Gyuto like the legendary Masamoto KS—matching technique to blade profile is the single most important factor in preserving edge geometry.
Knives designed with a pronounced belly curve benefit from a continuous sweeping arc. However, flatter profiles like the Masamoto KS demand a precise push-and-pull method to prevent rounding out the cutting edge or creating hollow spots along the board contact zone.
By mastering hand ergonomics, finding the factory bevel through tactile feedback, walking your pressure along the stone, and executing a clean deburring sequence, you can reliably bring high-carbon steel to a razor-sharp apex.
trust retailers BurrfectionStore | Gyuto | WasabiKitchen | Amazon
Disclosure: As an Amazon Associate, I earn from qualifying purchases.
Burrfection Sharpening Kit / Raw Equine Strops
1. Ergonomics: Asymmetrical Grip Architecture
A common mistake in freehand sharpening is assuming the grip remains identical on both sides of the blade. Because blade orientation flips relative to your dominant hand, your hand architecture must adapt to maintain control.
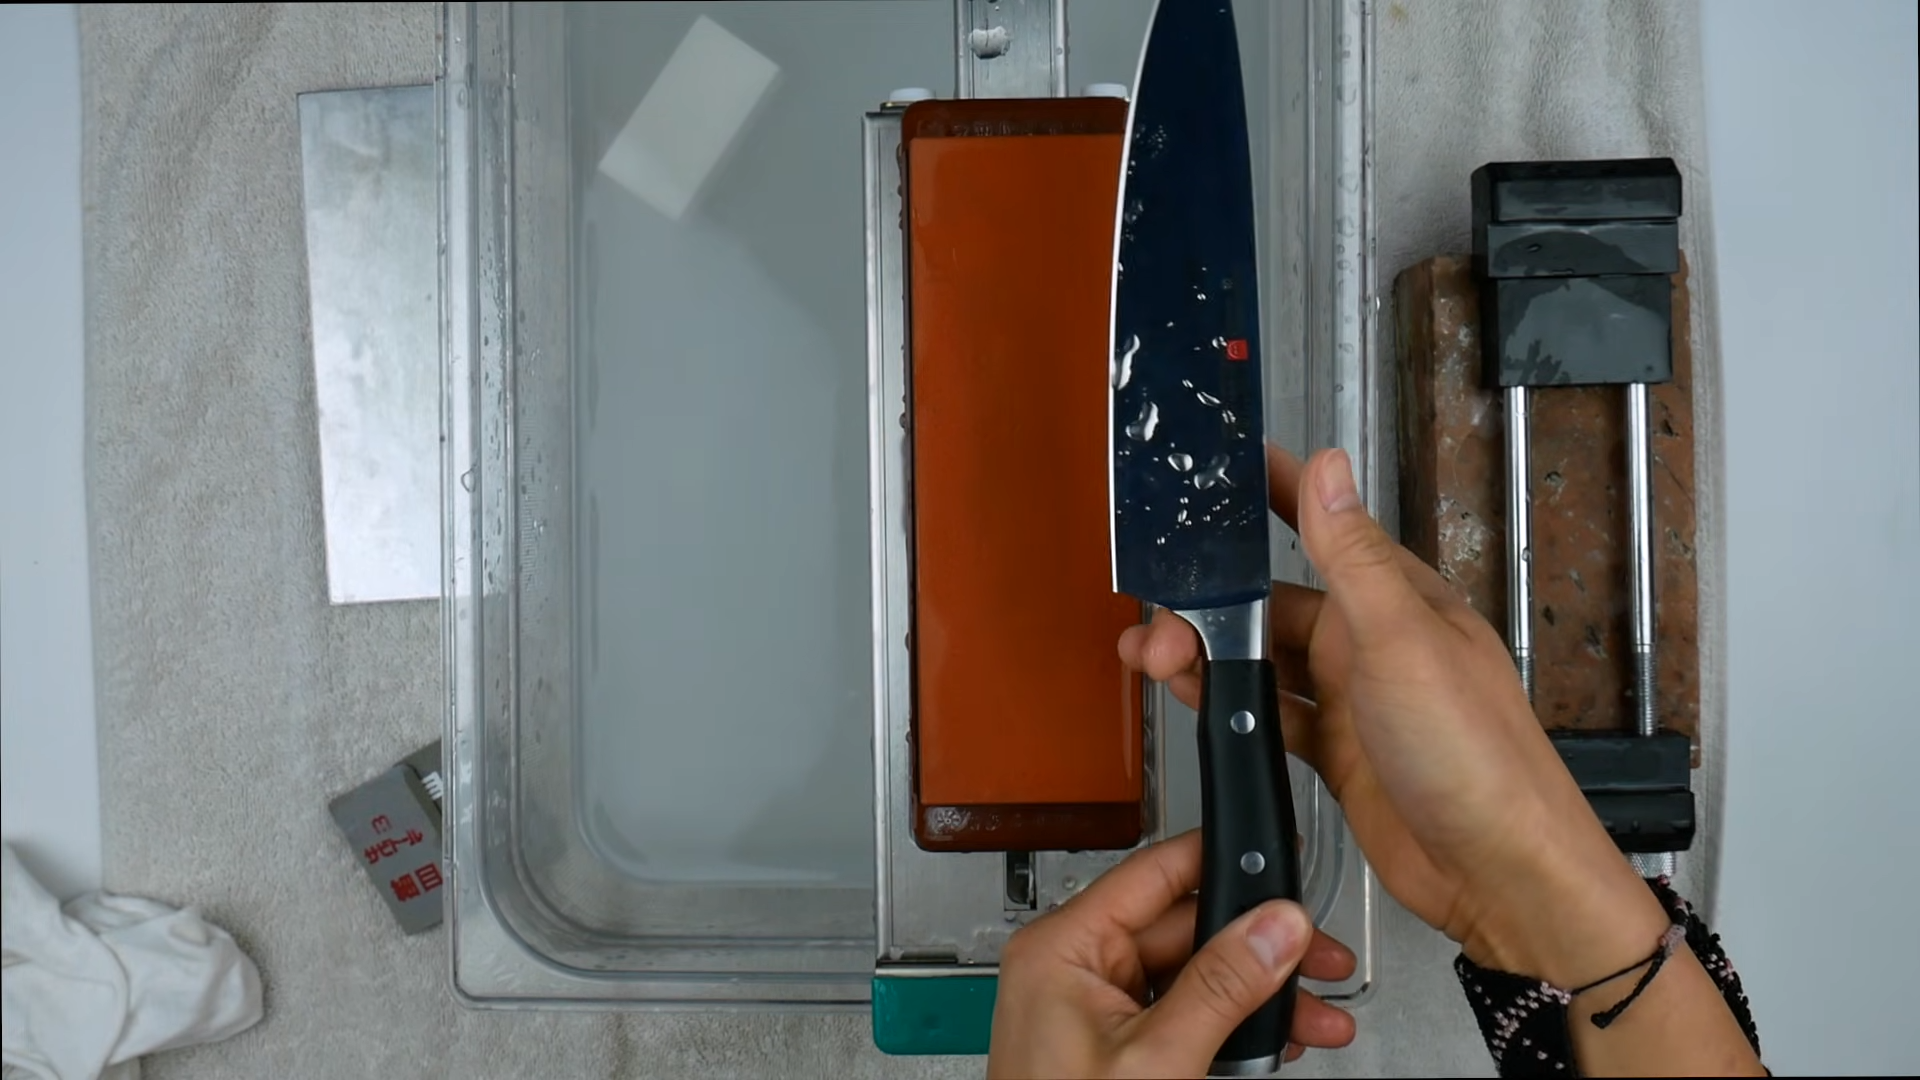
Right-Side Bevel Grip
Choil Anchor: Position your middle finger against the choil (neck) of the blade to establish a secure pivot point.
Heel Pin: Place your thumb directly onto the primary bevel near the heel. Skipping thumb placement on the heel leads to an unsharpened, dull section near the handle.
Spine Control: Wrap your index finger over the spine, keeping your hand relaxed to avoid tense, rigid wrist movements.

Left-Side Bevel Grip
Index Anchor: Place your index finger flat against the heel section first to establish reference control.
Handle Wrap: Wrap your remaining fingers securely around the handle.
Spine Balance: Rest your thumb along the spine to manage angle stability and maintain balanced contact across the stone.
2. Angle Finding:
Tactile Traction Over Rigid Degrees
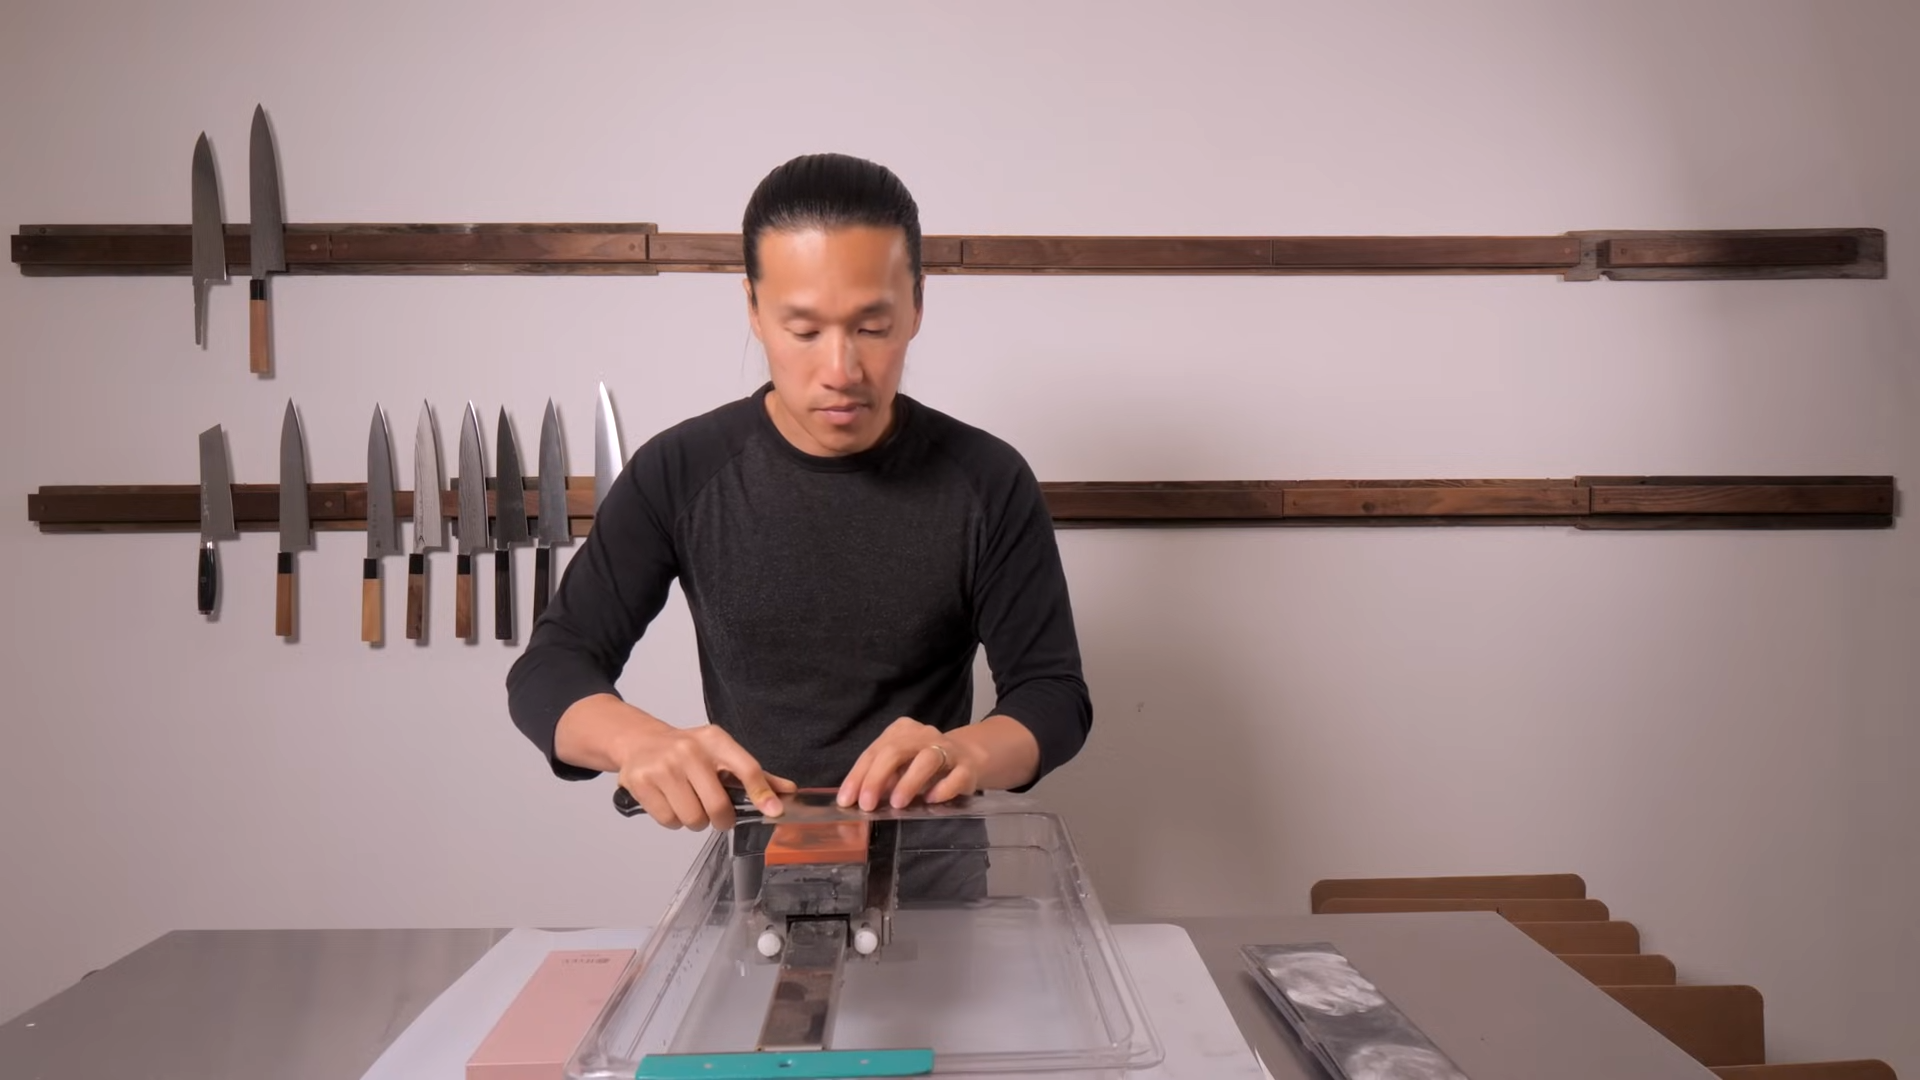
Relying on physical angle wedges or fixed degree numbers (like 15° or 17°) often causes conflict with the knife's true factory grind. Instead, find the precise angle through tactile friction:
[20° Approach] ---> Drag Backward Slowly ---> Lower Spine ---> [Feel Slip / Traction Change] ---> Back Off 1° (Factory Angle)
Place the blade onto the waterstone at an exaggerated angle (roughly 20 degrees).Slowly drag the knife toward you while lowering the spine toward the stone.
The Slip Indicator: As you lower the spine, you will feel a sudden drop in friction—a physical "slip"—indicating you have ridden past the primary edge and onto the shoulder.
Correction: The moment the blade slips, raise the spine back up by roughly one degree until the edge grabs the stone matrix. This is your true factory bevel angle.
3. Execution: Finger Walking and Edge-Trailing Pressure
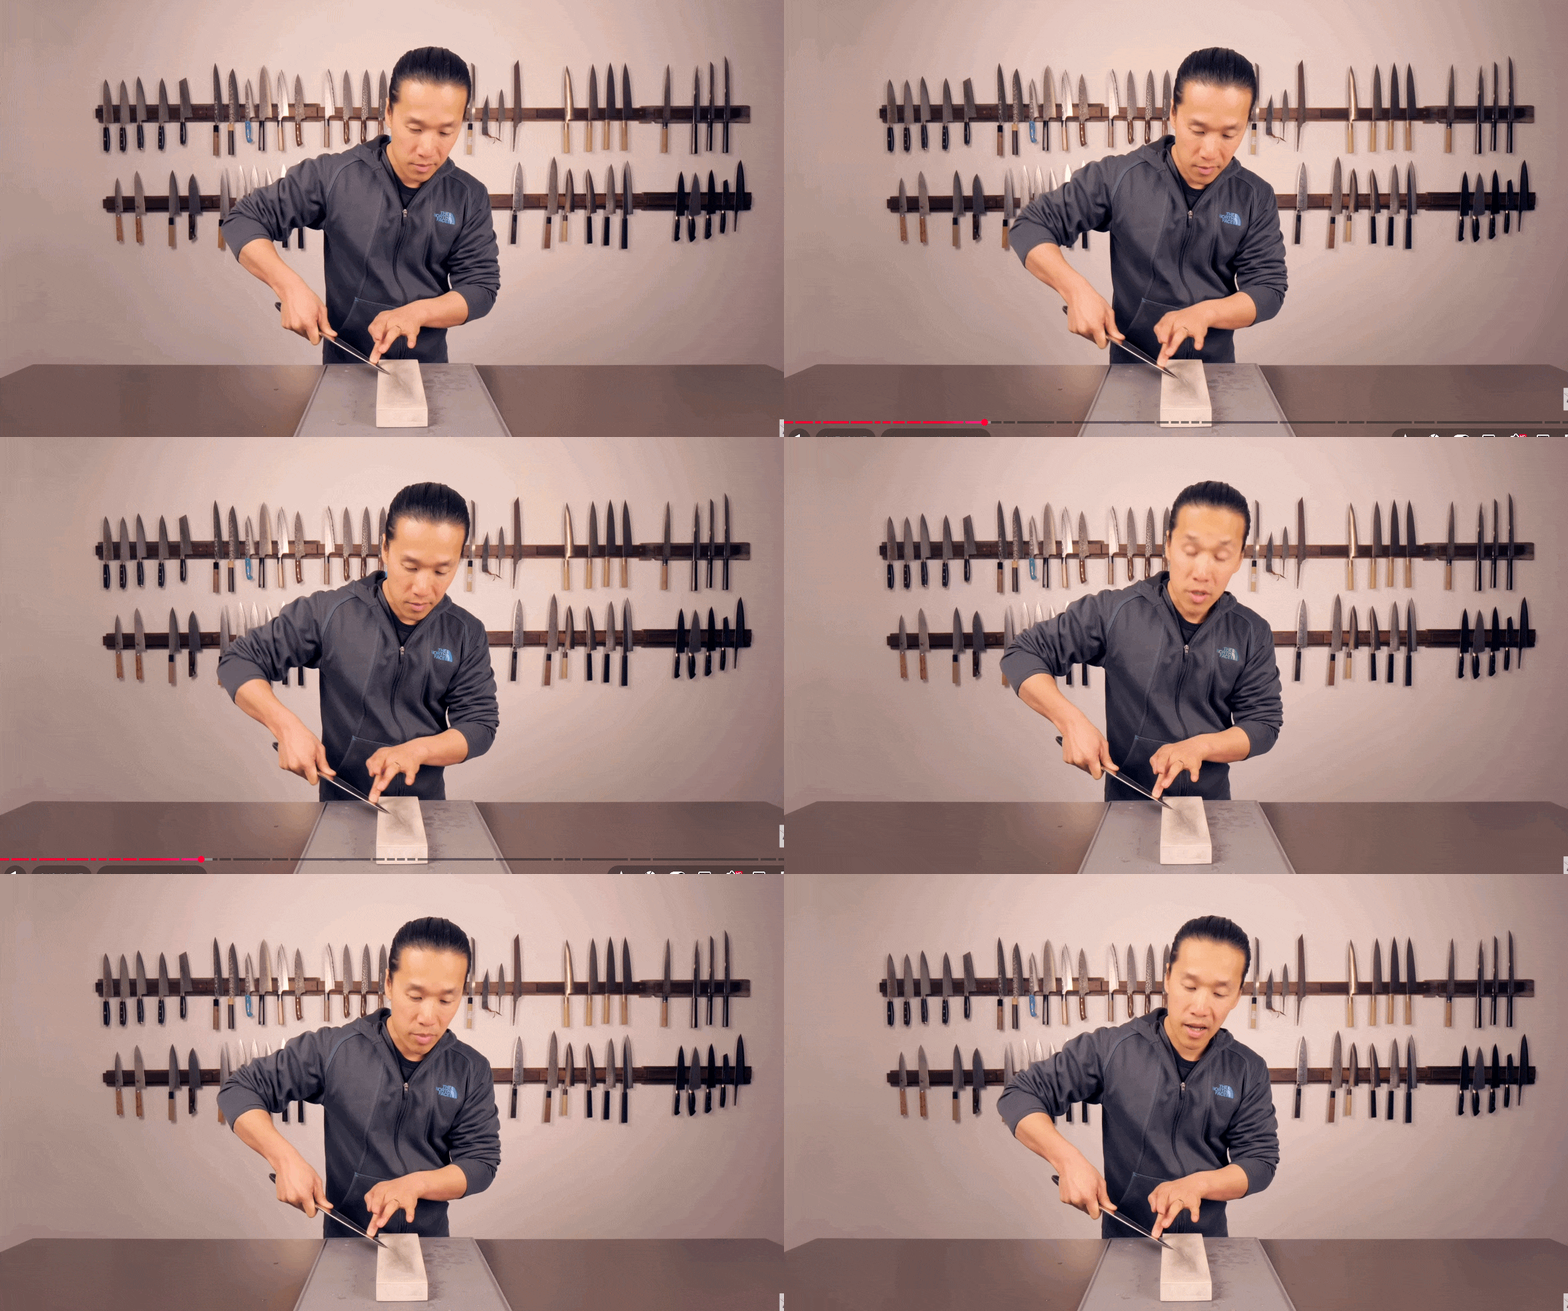
Linear profiles must be sharpened in distinct, overlapping sections moving from tip to heel (defined as one complete pass).
[ Section 1: Tip ] ---> [ Section 2: Mid-Blade ] ---> [ Section 3: Heel ]
(Finger pressure stays centered directly over the stone face)
The "Finger Walking" Rule
Place non-dominant finger pads on the primary bevel, roughly half an inch above the cutting edge.
Execute 3 to 4 push-and-pull strokes per section.
Lift and shift ("walk") your fingers roughly one inch down the blade to the next section.
Avoid Spine Resting: Never place non-dominant fingers along the spine. Pressing down on the spine alters your bevel angle and causes the blade to grind unevenly against the stone edges.
Pressure Application
Apply light downward force strictly during edge-trailing strokes (when the cutting edge faces toward you as you push or pull). When the stroke moves edge-leading into the stone, release pressure completely to prevent gouging the stone or crushing the delicate apex.
4. Burr Detection and Removal
Sharpening the primary bevel continues until a continuous micro-burr is formed along the entire length of the opposing side.
Detecting the Burr: Gently slide your finger pad vertically—from the spine downward past the cutting edge. A properly formed burr feels like a microscopic wire lip catch, similar to feeling a fine strand of hair lying on a glass table.
On-Stone Deburring: Reduce stroke counts from 3–4 passes per section down to 1–2 light passes per side, alternating sides to systematically fatigue and snap the wire edge off the apex.
5. Finishing & Refinement: Waterstone Stropping and Leather
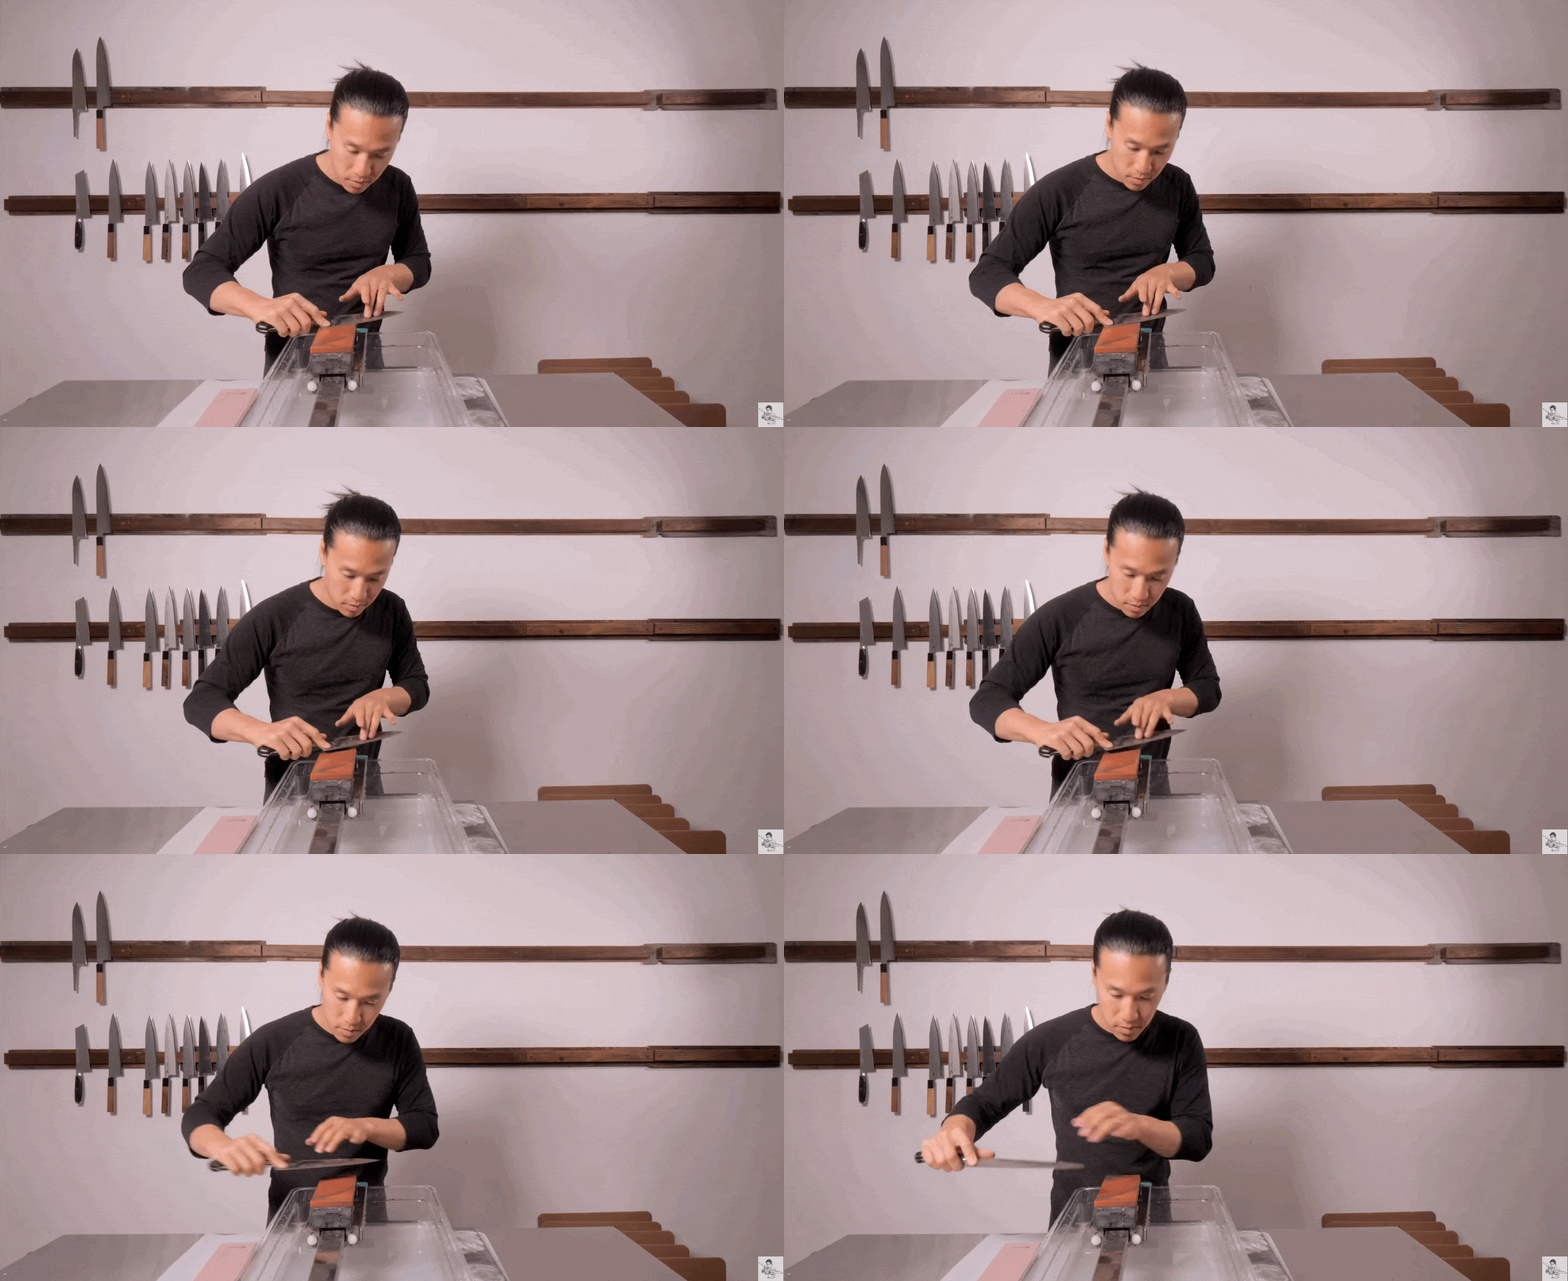
Once the edge has been deburred on your primary sharpening stone, step up to a fine polishing stone (5000+ grit) or a dedicated leather strop to refine the scratch pattern.
[Primary Stone] ---> On-Stone Alternating Passes ---> [Fine Polishing Stone] ---> [Loaded Leather Strop (10 Passes/Side)]
Whetstone Stropping: Perform light, sweeping single strokes from heel to tip across the polishing stone, executing 10 to 20 alternating pairs using only the weight of the blade.Leather Strop Refinement: Transition to a thick (4mm+) leather strop loaded with a micro-abrasive compound (such as 9000-grit). Execute roughly 10 light trailing strokes per side. The yielding nature of leather draws micro-particulates off the apex, leaving a clean, hair-popping edge.
Post-Sharpening Hygiene
Always wash and dry your blade thoroughly with warm, soapy water after sharpening. Removing residual abrasive slurry or stropping compounds ensures your knife remains food-safe and ready for immediate kitchen prep.