Mastering the Yanagiba: The Complete Single-Bevel Sharpening Blueprint
Single-bevel Japanese knives—most notably the Yanagiba—intimidate a lot of sharpeners. Unlike a standard Western chef’s knife or a double-bevel Gyuto, a Yanagiba demands a fundamentally different understanding of blade geometry, pressure distribution, and abrasive contact.
To prove exactly how these mechanics work, we are starting with an extreme zero-baseline: taking a brand new, razor-sharp Yanagiba and intentionally grinding the apex completely flat against a raw backyard brick.
Restoring a brick-dull Yanagiba back to a screaming, paper-slicing apex isn't about rushing to build a burr. It requires a slow, methodical progression that protects the knife's delicate structural lines. Here is the complete technical blueprint for sharpening single-bevel Japanese cutlery.
trust retailers BurrfectionStore | Gyuto | WasabiKitchen | Amazon
Disclosure: As an Amazon Associate, I earn from qualifying purchases.
Burrfection Sharpening Kit here
Rule #1: Dead-Flat Abrasives Are Non-Negotiable
If you are familiar with the broader Burrfection sharpening philosophy, you know that obsessively flattening whetstones before every session is often unnecessary for standard double-bevel knives.
Single-bevel knives are the absolute exception.
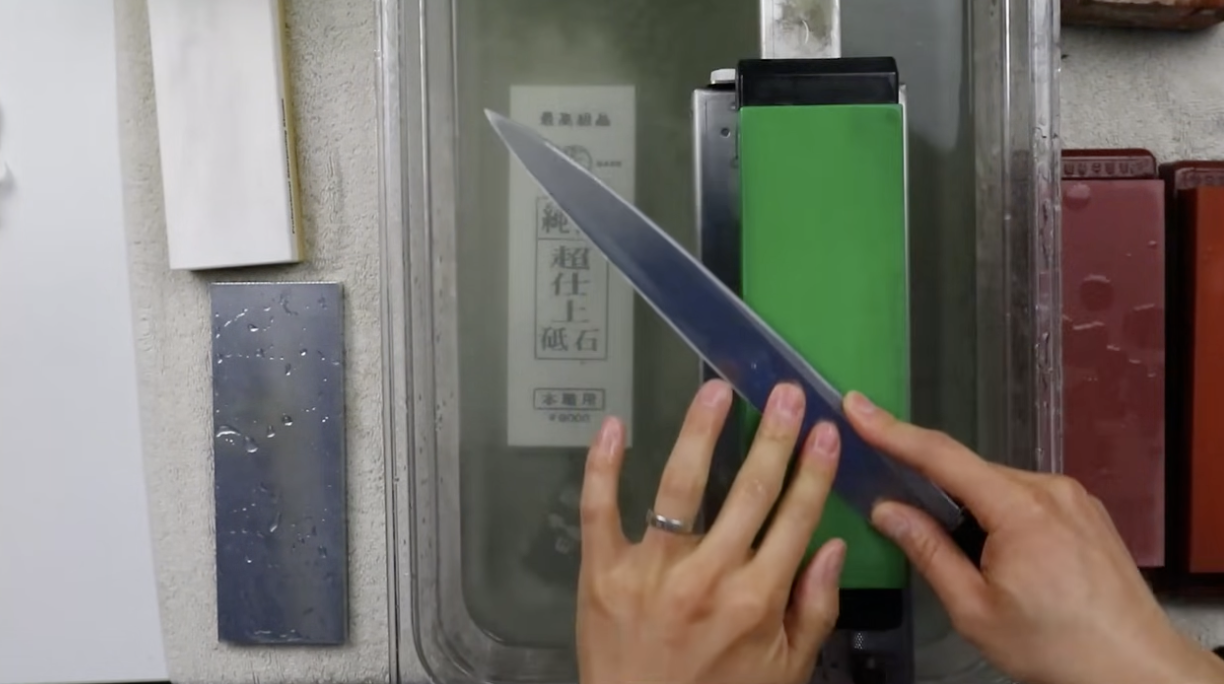
Because you are working with large, flat planes—specifically the wide chisel bevel and the concave back—any dishing or cupping in your whetstone will immediately transfer to the blade, permanently warping its geometry. Before a Yanagiba ever touches a stone, use a diamond plate to ensure your abrasives (in this case, a Chosera 1000 and a Naniwa Snow White 8000) are trued completely flat, clearing all corners and edges.
The Physics of Pressure and Hand Placement
Before making a single pass, your grip and pressure mechanics must be dialed in.
1. Lock Down the Heel
When sharpening a Yanagiba, you must always keep your thumb and index finger anchored over the heel of the knife. If you neglect the heel and place all your downward pressure toward the middle or tip of the blade, two things happen:
You leave the heel entirely unsharpened.
The knife’s weight shifts backward, causing the blade to tilt off its bevel, rounding the edge and ruining the geometry.
2. Edge-Trailing Pressure Only
Never apply downward pressure on an edge-leading stroke (pushing the cutting edge into the stone). Doing so forces the thin, delicate apex to dig into the abrasive matrix.
Edge-Trailing: Apply a few ounces of pressure as the knife moves away from the cutting edge.
Edge-Leading: Completely release the pressure, letting the knife glide back across the slurry.
Phase 1: The Uraoshi (The Flat Side) Protocol
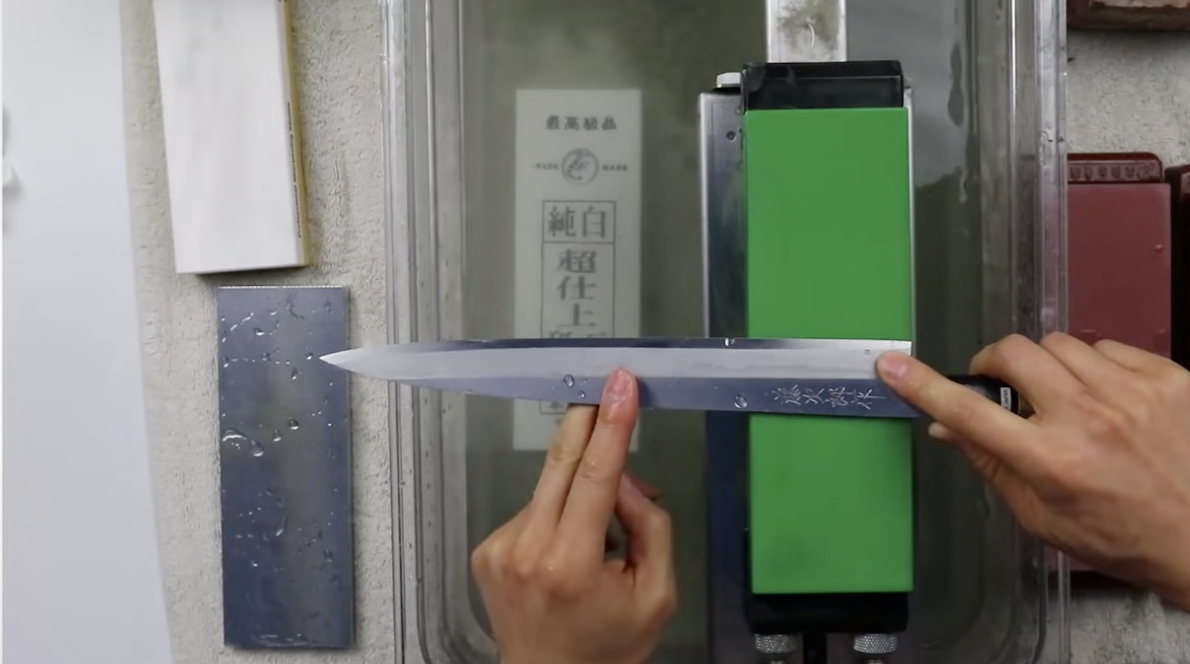
The back of a Yanagiba is not actually flat; it features a concave hollow grind called the Urasuki. The only parts of the back that touch the stone are the perimeter edges.
The Perpendicular Lock: Lay the knife completely flat against the stone. Do not turn or angle the blade. Unlike double-bevel knives that are sharpened at a 45-degree angle to the stone, the Uraoshi must be sharpened perfectly perpendicular to the whetstone.
Zero Downward Pressure: Do not apply active pressure. If you push down, you risk tilting the blade and destroying the delicate, polished perimeter. Let the weight of the steel and your hands do the work.
Managing Water: Because the knife sits completely flat, it acts like a squeegee, pushing water off the stone rapidly. You will need to rehydrate the stone constantly to maintain a slick, hydrodynamic layer.
Work the knife up and down the length of the whetstone until you feel a uniform micro-burr roll over to the right side of the blade.
Phase 2: Sharpening the Shinogi (The Bevel Side)
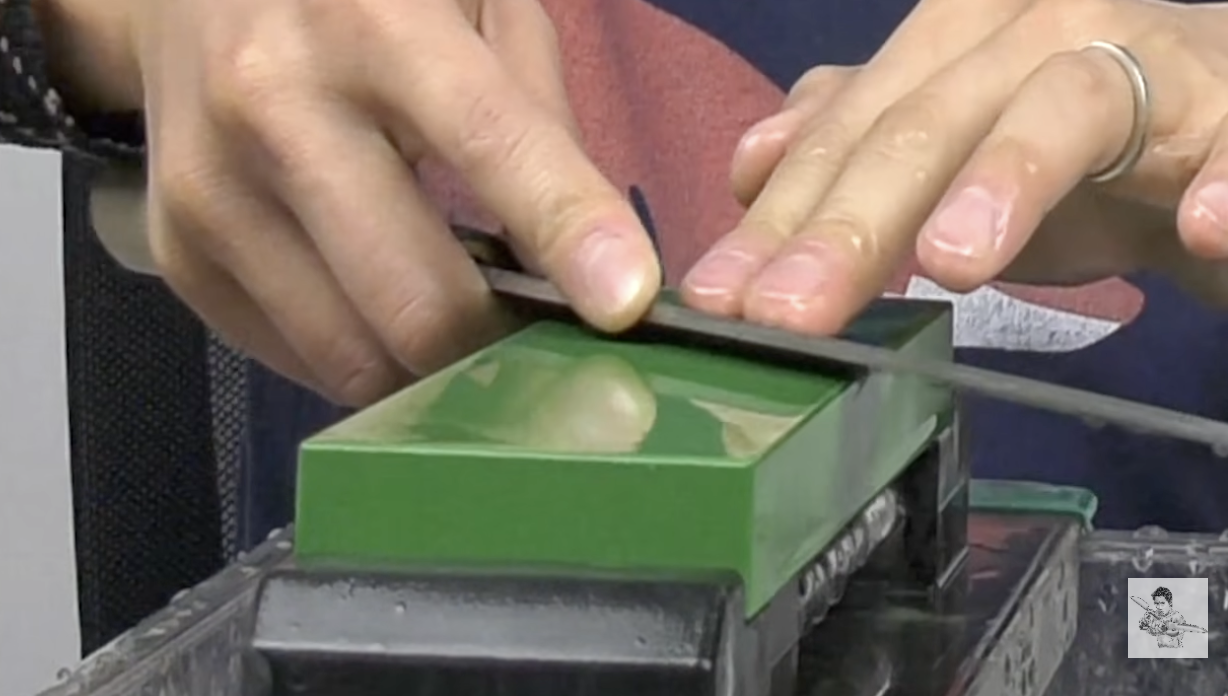
Once the back is prepped, flip the knife to the right side to work the wide primary bevel up to the Shinogi line.
Sectional Linear Sharpening: Because the Yanagiba's edge is predominantly straight, your sharpening motion must be strictly linear. Work in isolated two-inch sections, starting from the tip and moving down to the heel.
Locking the Chisel Plane: Apply your fingers directly over the edge of the section you are working on. This ensures the wide bevel sits perfectly flush against the stone. If the blade rocks backward, you will heavily scratch the polished face of the knife.
Pass Count: Do two to three edge-trailing strokes per section, then move down. Focus on consistency rather than speed.
Phase 3: High-Grit Polishing & Swarf Management
Once a clean burr is established and refined on your medium stone (e.g., Chosera 1000), transition to a high-grit polishing stone like the Naniwa Snow White 8000.
As you refine the Shinogi line on an 8000-grit stone, the wide surface area of the steel will generate dark swarf (metal particulate) quickly. When the stone begins to feel "sticky" or the blade starts suctioning to the surface, stop immediately.
Pro-Tip: The Rust Eraser Hack While traditional Nagura stones work well to clean polishing stones, a medium-grit Sabitoru Rust Eraser removes embedded metal particulate much faster. It creates a pristine, chalky surface in seconds and wears down significantly slower than a standard Nagura.
Once the stone is clean, execute descending, weightless passes on both the Uraoshi and Shinogi sides until the burr is completely eradicated.
Phase 4: Setting the Micro-Bevel
You have a flat back and a perfectly refined wide bevel. Now, you must establish the final cutting apex—the micro-bevel.
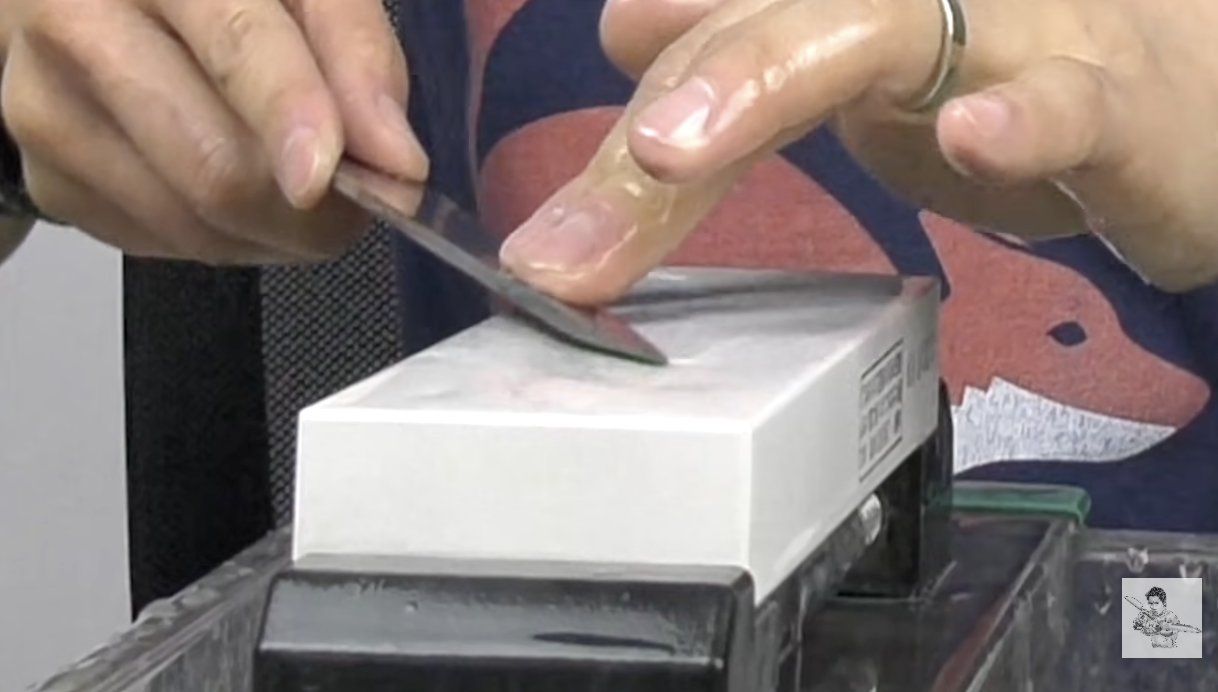
Lay the knife flat on the Shinogi line exactly as you did during Phase 2.
Lift the spine of the knife just a hair—no more than 1 to 3 degrees higher than the primary bevel.
Execute only two or three light, edge-trailing passes along the length of the blade.
Flip to the Uraoshi side and do a single, weightless pass to align the microscopic teeth.
Crucial Warning: Once you set this micro-bevel, you cannot go back and lay the knife flat on the Shinogi line again. Doing so will immediately grind away the micro-bevel you just created.
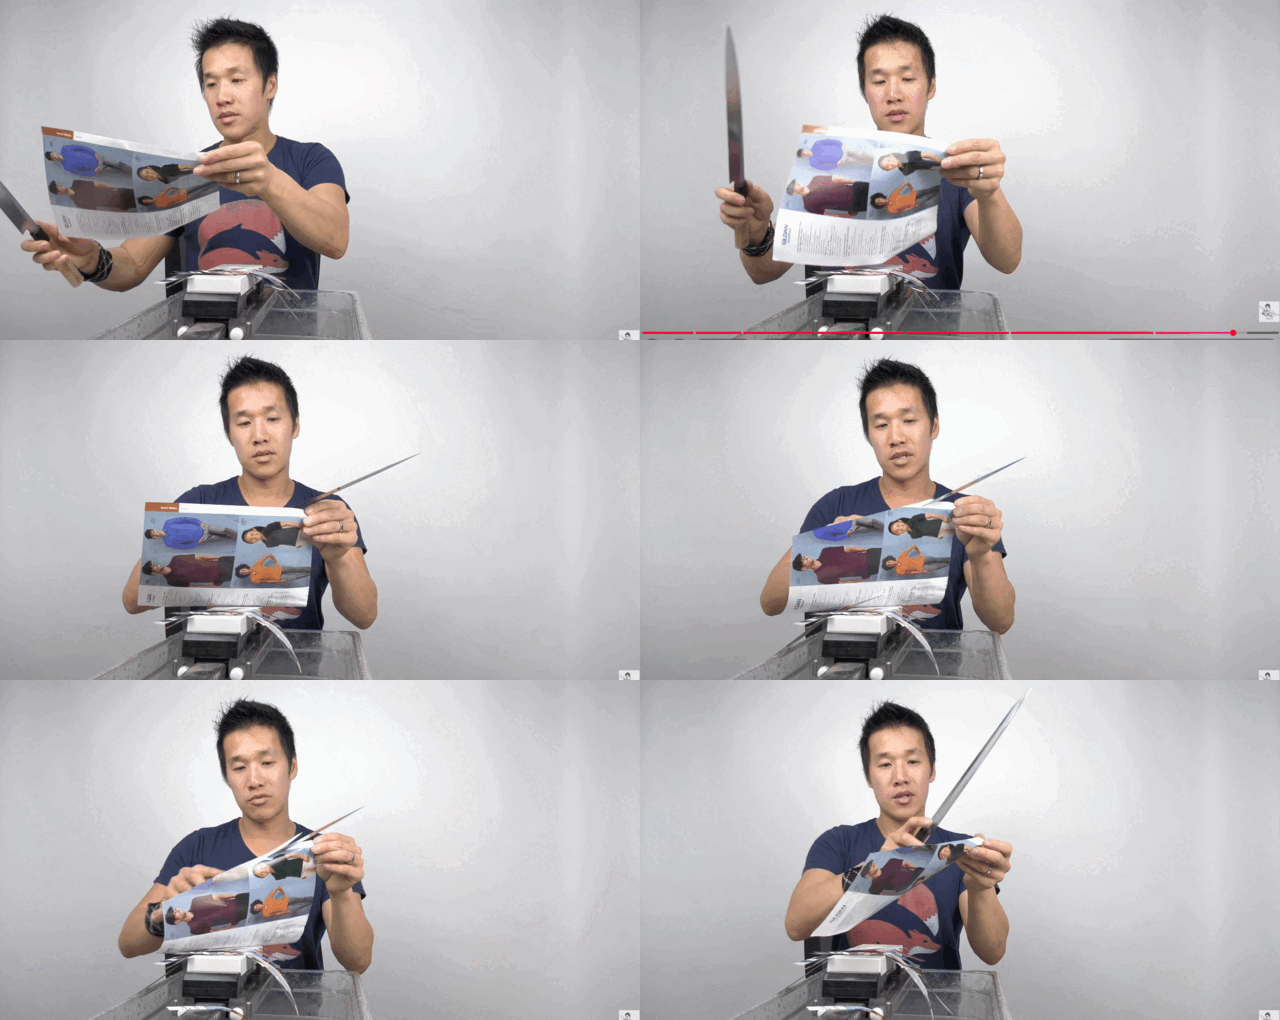
The Final Edge Inspection
Check entire cutting edge for a clean cut.
A true test of a Yanagiba's edge isn't just whether it can cut paper—it is how it cuts paper. When slicing through magazine paper or newsprint, the blade should glide from the heel to the needle-tip in complete silence without a single snag, hesitation, or tear. A snag indicates an area where the burr was not properly removed or the angle wavered.
Sharpening a single-bevel knife is an exercise in restraint. Focus on keeping the planes flat, meticulously controlling edge-trailing pressure, and letting the abrasive matrix do the heavy lifting.
Do not use cheap whetstones. Get real quality whetstones from Japan.