The Mechanics of Fluid Freehand Sharpening: Mastering the Continuous Arc Technique
The continuous arc method—widely popularized across the internet through high-profile master culinary videos—is often presented as a hypnotic, continuous motion. Watching an expert sweep a chef's knife from heel to tip across a waterstone in five minutes looks effortless.
However, many tutorials skip the underlying mechanics, leaving home cooks with inconsistent bevels, skipped sections, and rounded tips.
Executing this sweeping motion requires breaking the fluid stroke down into its structural components, adjusting your stance, and managing pressure along the blade's profile.
Disclosure: As an Amazon Associate, I earn from qualifying purchases.
my favorite sharpening stones and kit
1. Ergonomics & Stance: Distance and Control
Precision sharpening is anchored in body mechanics. Positioning your equipment incorrectly forces your arms to compensate, leading to uneven bevels and joint fatigue.
[Too Far Away] ---> Extended Arms ---> High Uncontrolled Force & Edge Wear
[Optimal Setup] --> Stones Close ---> Natural Pivot & Controlled Counterbalance

Proximity to the Stone
Keep a comfortable distance from the stone so you are not reaching for it.
Avoid Over-Extension: Positioning the stone too far out forces your elbows to lock and your arms to extend. This causes your shoulders to exert excess downward pressure onto the stone face, leading to uneven metal removal.
Proximity for Balance: Keep the waterstone container close to your torso—high enough on the worktop so you aren't hunching, but close enough to let your shoulder act as a stable anchor.
The Non-Dominant Counterbalance: Your non-dominant hand resting on the blade face is not meant to press down. It serves purely as a physical weight balance to keep the blade tracking smoothly along the stone.
Adapting the Grip
For rigid, push-pull sharpening, a classic pinch grip—index finger along the spine, middle finger on the choil, and thumb stabilizing the heel—provides maximum static control.
However, because fluid sweeping requires continuous wrist rotation, a tight pinch grip can restrict movement. If your hands are smaller or the handle is thick, transition to a flexible relaxed pinch grip near the bolster to give your wrist room to pivot.
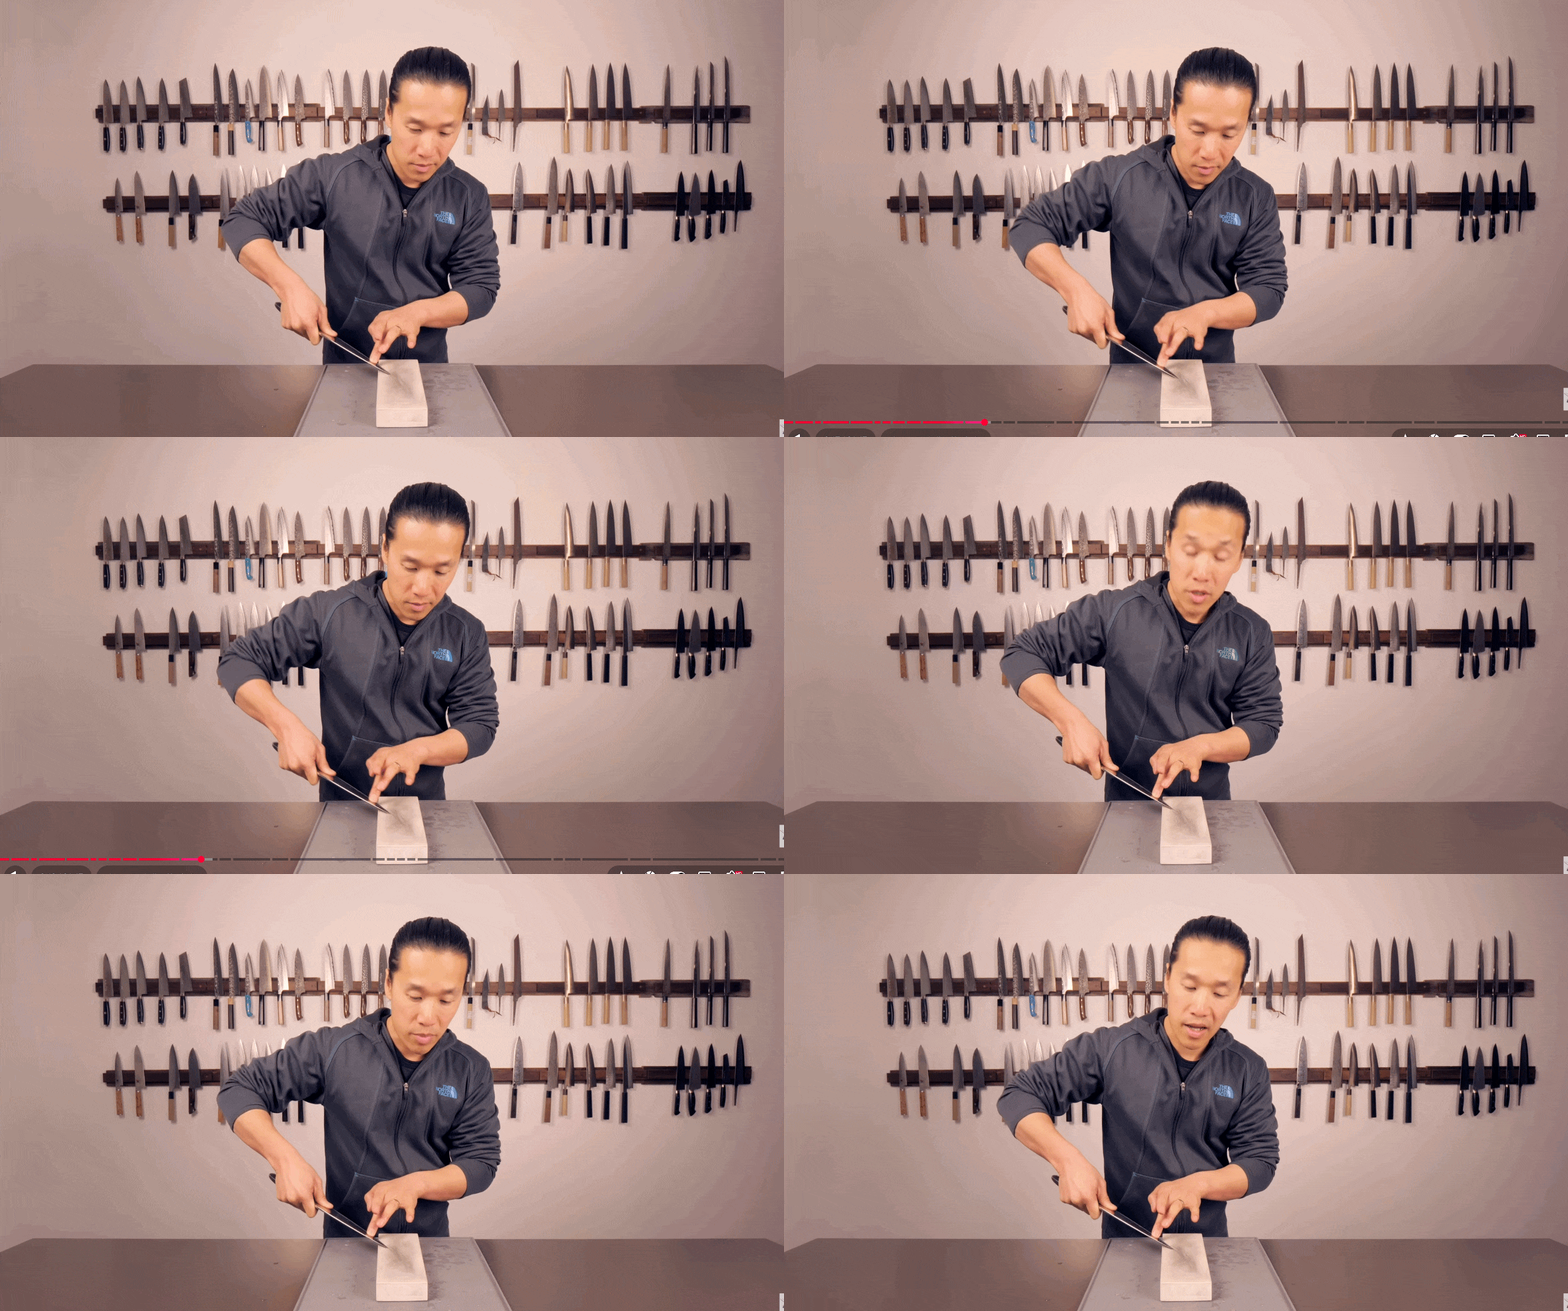
Knife sharpening with smooth arc motion
2. Decoupling the Arc: Belly vs. Flat Section
Different sections of a blade profile require distinct physical paths across the stone. Attempting to run a single, static curve across a knife with a flat heel section usually results in skipping the midsection entirely.
Phase A: The Curved Belly (Rotational Arc)
The Motion: Starting with the tip on the far side of the stone, draw the blade backward in a gentle, sweeping arc toward the belly.
Wrist Dynamics: Keep your elbow relatively static while allowing your wrist to flex naturally upward as you track along the curve. This prevents flattening the rounded profile near the tip.
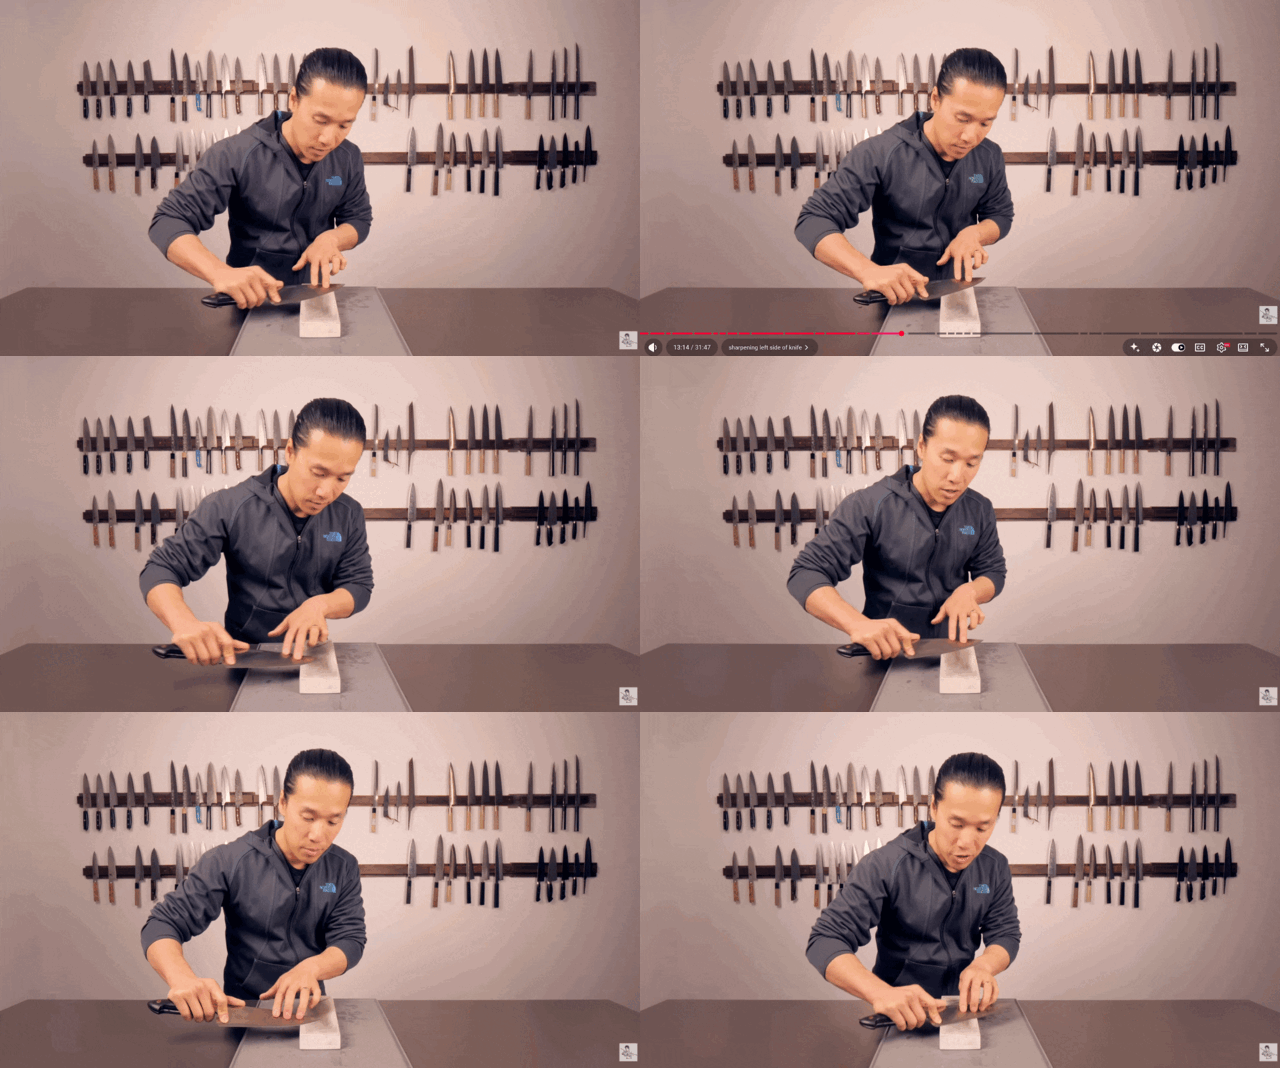
Phase B: The Flat Rear Third (Linear Sweep)
Go from heel to tip in a smooth motion
The Motion: As the stroke reaches the flat, rear third of the blade near the heel, the rotational arc must flatten out into a straight push-pull stroke.
Preventing the "Midsection Gap": If you maintain a continuous rotational curve through the flat portion of the heel, the center of the blade will lift off the stone, grinding only the extreme tip and the extreme heel.
When executed seamlessly, the stroke transitions from a linear push at the heel into a pivoting rotational arc at the belly, ensuring full edge contact across the entire profile.
3. Left-Side Transitions & Symmetrical Burr Removal
Sharpening the non-dominant side of a knife introduces clearance issues near the handle and heel.
Pivoting for Clearance: When working the left side of the blade, rotate the knife slightly more perpendicular to the stone as you approach the heel. This prevents the handle or bolster from hitting the stone edge.
Pressure Isolation: Apply subtle pressure only on edge-trailing strokes (pulling the spine away from the cutting edge). When pushing edge-leading into the abrasive, release all pressure to prevent gouging the stone or rolling the delicate apex.
The Systematic Deburring Progression
Before moving to a fine finishing stone, clean up the raised wire edge using a systematic pass-reduction count:
Execute 10 alternating passes per side (Heel to Tip).
Reduce to 6 alternating passes per side.
Reduce to 2 alternating passes per side (repeat 3–4 times).
Finish with 1 light trailing pass per side (repeat 6–12 times using zero hand pressure).
4. Refining the Apex: Progression and Tip Geometry
[1000-Grit Base Stone] ---> Complete Deburring ---> [5000-Grit Finishing Stone (Trailing Strokes Only)]
Transitioning to Fine Polishing
When stepping up to a fine finishing stone (such as a 5000-grit waterstone), do not restart a heavy sharpening cycle. The primary bevel geometry has already been established.
Instead, enter the polishing phase at the single-stroke trailing stage—performing light, full-length passes from heel to tip to refine the scratch pattern and align the apex.
When executed seamlessly, the stroke transitions from a linear push at the heel into a pivoting rotational arc at the belly, ensuring full edge contact across the entire profile.

stropping a recently sharpened knife
Pro-Tip: Maintaining Consistent Tip Bevels
Because thin knife tips flex under hand pressure, the bevel width near the tip often widens compared to the heel. To maintain an aesthetically clean, uniform bevel width from heel to tip:
Micro-Angle Adjustment: As your stroke transitions from the belly to the thin tip, elevate the spine by roughly 1 degree (less than a millimeter).
Alternatively, bring the blade into a slightly more vertical alignment during the tip arc.
This micro-elevation compensates for metal flex and variable blade geometry, producing a crisp, uniform bevel along the entire length of the blade.
use what you have, but here are my favorite sharpening whetstones kit